> For the complete documentation index, see [llms.txt](https://support.onlogic.com/llms.txt). Markdown versions of documentation pages are available by appending `.md` to page URLs; this page is available as [Markdown](https://support.onlogic.com/product-documentation/components-and-expansion/power-supplies/pa-480w-din-480w-din-psu.md).
# PA-480W-DIN (480W DIN PSU)
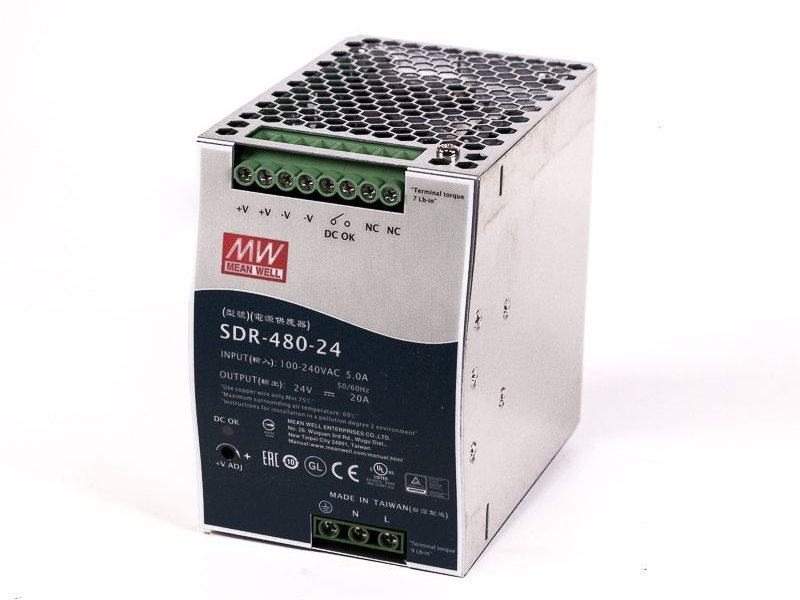
Guide to assembling and connecting the PA-480W-DIN power supply, including wiring and safety checks.
## Assembling the PA-480W Power Supply
Use these instructions to help assemble the [PA-480W-DIN](http://pa-480w-din/) power supply for use.
***
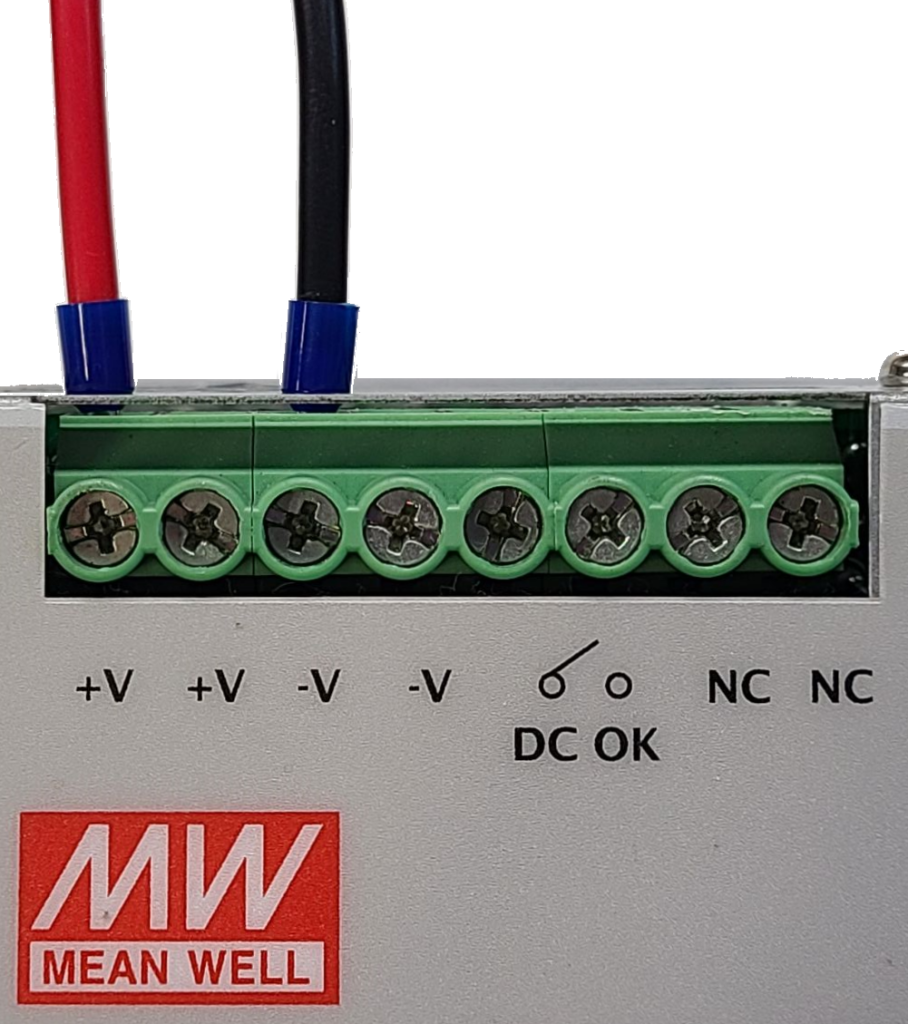
1. Connect wires to the +V and -V terminals. Make sure the terminal screws are hand-tight.
***
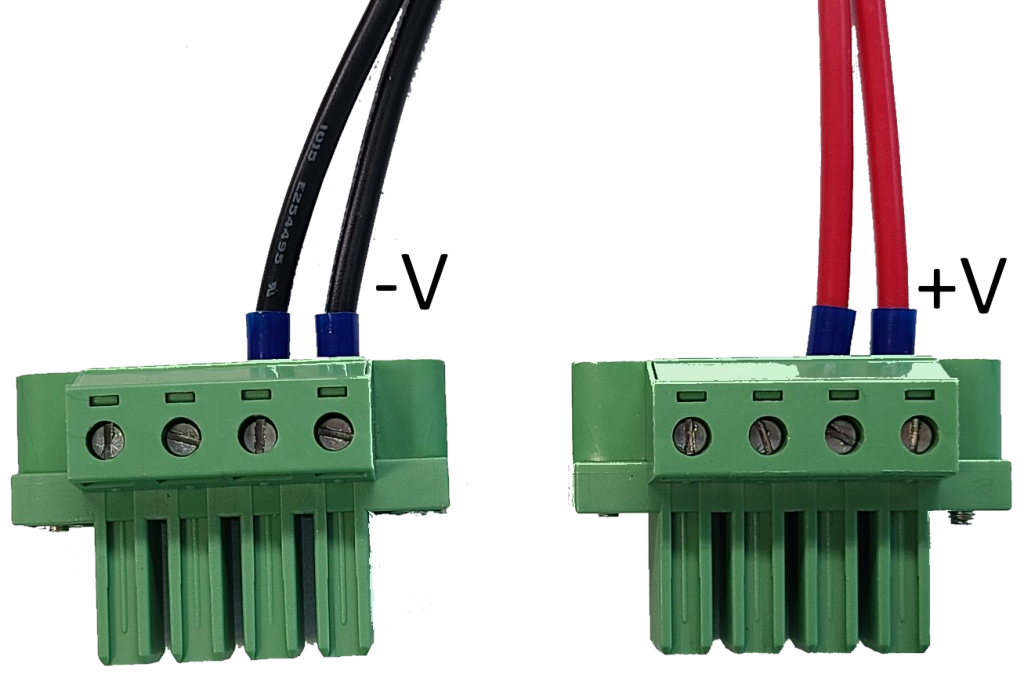
2. Connect the terminal block connectors to match your computer. Check the back of the system to the exact pinout.\
\
The system’s manual can also be referenced for the proper wire pinout.
\*Note: Incorrect system wiring may cause damage to the system
***
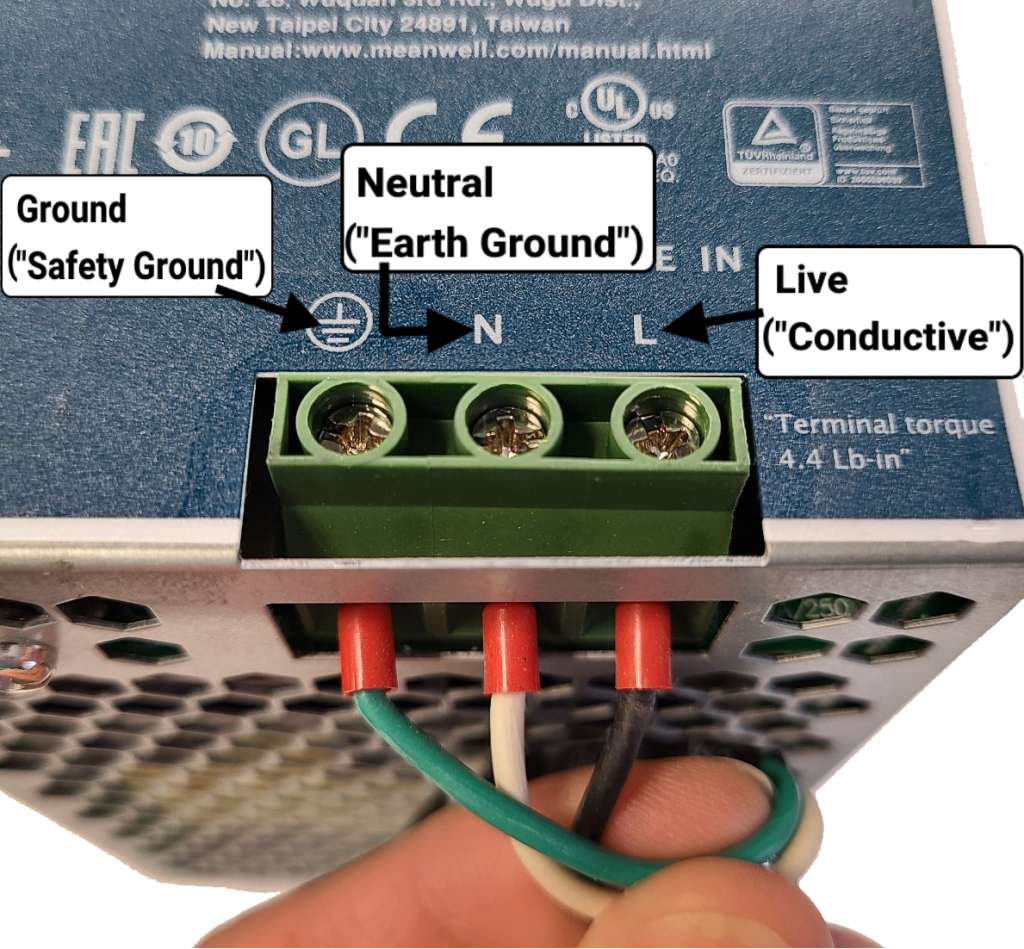
3. Connect your AC cable (such as the [PWRNSFL-6](https://www.onlogic.com/store/pwrnsfl-6/))
4. Doublecheck all connections, to make sure they are correct
5. The power supply is now ready for use