For Windows instructions, Click Here.
Introduction
The OnLogic NWK200 is an mPCIe carrier board paired with the Sierra Wireless EM7455 Cellular Modem. This article covers basic setup and troubleshooting.
FAQ (Frequently Asked Questions)

LTE Bands 1, 2, 3, 4, 5, 7, 8, 12, 13, 20, 25, 26, 29, 30, 41
HSPA+/UMTS Bands 1, 2, 3, 4, 5, 8
50 Ω. Maximum antenna gain 6dBi.
SIM cards and Activation
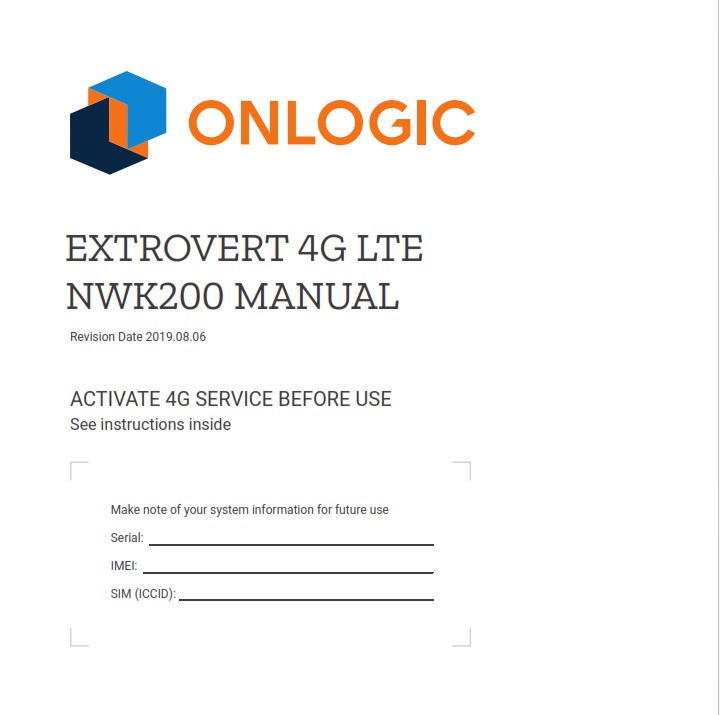
- Locate the Extrovert booklet that came with your system.
- If an ICCID number is listed, your system already has a SIM card installed internally and is ready to activate. If not, you will need to provide a SIM card. See: Using External SIM slot
- Contact your wireless carrier. State that you want to activate a 4G modem and provide the numbers on the front of the booklet.
Modem Setup
- Ensure you are in an area with good signal coverage
- Connect both antennas and boot up the OnLogic PC
Opening the AT Command Terminal

- Install PUTTY
Note: If installing from a live CD, you will need to enable the multiverse/universe repositories

- Run PuTTY as root
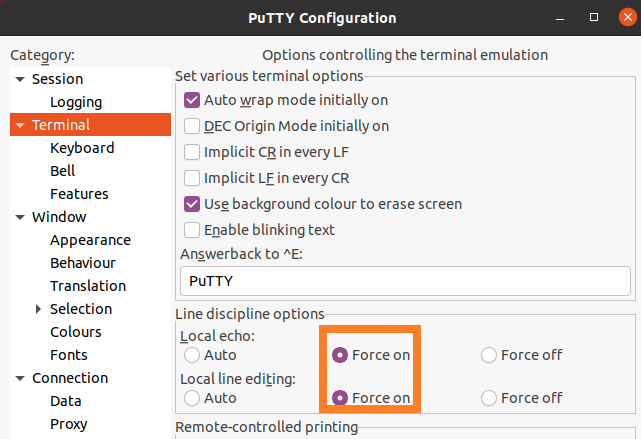
- Set the options shown
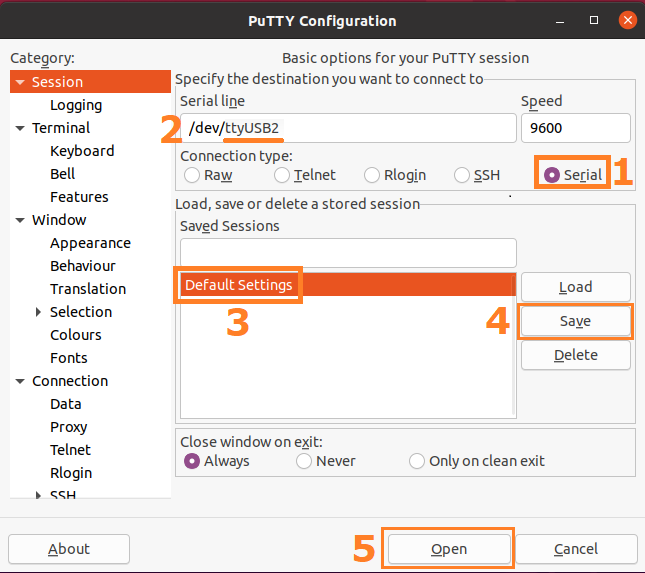
- Select the serial option
- Change the COM device to ttyUSB2
- Click on default settings
- Click Save
- Click open
This configures PuTTY to automatically choose the correct options next time it is run.

- Begin by typing ATE1 and pressing enter. The terminal should respond with OK. This indicates the modem is ready for commands.
- If the COM port does not open correctly, try ttyUSB0 or ttyUSB1
- The first item to check is the firmware setting. It should match the desired carrier.
at!impref?
- In the example above, the generic firmware is loaded. The carrier specific firmware should be used instead.
- Run the following commands:
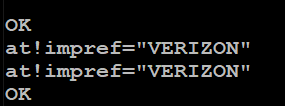
at!impref=”CARRIER”
where CARRIER is ATT,VERIZON,SPRINT
Note: if your carrier is not listed, download the correct firmware from the following webpage:
https://source.sierrawireless.com/resources/airprime/minicard/74xx/em_mc74xx-approved-fw-packages/

at!reset
- Power down and unplug the PC for a moment, then boot it back up.
Operating System Configuration
Now that the modem firmware has been configured, the next step is to configure the operating system. Skip to the section for your OS.
Ubuntu Desktop 16.04
- NWK200 support in Ubuntu 16 Desktop requires:
- Kernel version greater than 4.7
- Modem manager from Ubuntu 18.04 or later
- You will need to make sure you are running a kernel version 4.7 or newer. This can be checked from the Terminal with:
uname -r- If your kernel version is older than 4.7, update to newer version with:
sudo apt-get install linux-image-generic-hwe-16.04
- To configure Ubuntu Desktop with the NWK200 model, you will need to use the Terminal to update and install the Modem Manager, along with a few additional pieces of software.
- From the terminal run the following commands:
sudo add-apt-repository “deb http://us.archive.ubuntu.com/ubuntu bionic main”sudo apt-get update
- You can now install the new modem manager:
sudo apt-get install modemmanager
- Remove the repository:
sudo add-apt-repository -r “deb http://us.archive.ubuntu.com/ubuntu bionic main”
- After modem manager has been installed, reboot the system and unplug all wired Ethernet connections

- Click on the WiFi icon in the top right and select “New Mobile Broadband connection”
- Follow the prompts to add your LTE connection configuration.

- Ensure the APN matches what your carrier provided. The standard APN for Verizon is shown. If this does not work, check with the carrier.

- Wait a few minutes, and the connection should be established
Ubuntu Desktop 18.04
- Install modem manager with the following terminal command:
sudo apt-get install modemmanager- After modem manager has been installed, reboot the system and unplug all wired Ethernet connections

- Open the system menu from the right side of the top bar.
- Select Mobile Broadband Off. The Mobile Broadband section of the menu will expand.
- Select Connect.

- If you are connecting for the first time, the Set up a Mobile Broadband Connection wizard is launched. The opening screen displays a list of required information. Click Next.
- Choose your provider’s country or region from the list. Click Next.
- Choose your provider from the list. Click Next.

- Ensure the APN matches what your carrier provided. The standard APN for Verizon is shown. If this does not work, check with the carrier.
- Confirm the settings you have selected by clicking Apply. The wizard will close and the Network panel will display the properties of your connection.

- Wait a few minutes, and the connection should be established

Ubuntu Desktop 20.04
- Install modem manager with the following terminal command:
sudo apt-get install modemmanager- After modem manager has been installed, reboot the system and unplug all wired Ethernet connections

- Open the system menu from the right side of the top bar.
- Select Mobile Broadband Off. The Mobile Broadband section of the menu will expand.
- Select Connect.

- If you are connecting for the first time, the Set up a Mobile Broadband Connection wizard is launched. The opening screen displays a list of required information. Click Next.
- Choose your provider’s country or region from the list. Click Next.
- Choose your provider from the list. Click Next.

- Ensure the APN matches what your carrier provided. The standard APN for Verizon is shown. If this does not work, check with the carrier.
- Confirm the settings you have selected by clicking Apply. The wizard will close and the Network panel will display the properties of your connection.
- Wait a few minutes, and the connection should be established

Ubuntu Server 20.04
- Install Modem Manager
sudo apt-get install modemmanager network-manager
sudo reboot
2. Configure mmcli (modem manager command line interface) so it can interface with the modem
sudo mmcli -L
sudo mmcli -m 0
3. The 0 here is returned by sudo mmcli -L and will vary depending on the configuration. Replace the 0 if the output of the first command differs.
The output of the mmcli -m 0 command will output the modem info. The info we want to grab is “primary port.” This will most likely be ‘cdc-wdm0’ and will be used in the following command in place of <interface>.

<name> can be set to any value. This will be the name of the connection that shows up in networkmanagers / nmcli. The will be dependent on the SIM in use and it’s respective carrier APN.
nmcli c add type gsm ifname <interface> con-name <name> apn <operator_apn>For example, a verizon SIM configuration will use the following commands:
nmcli c add type gsm ifname cdc-wdm0 con-name vzw apn vzwinternet

nmcli c modify <name> connection.autoconnect yes

nmcli r wwan on

nmcli c up <name>
Updating the Firmware
Firmware updates can be downloaded from the Sierra Wireless website linked below.
- Firmware versions are carrier specific. Download the version for your carrier. Use Generic if yours is not listed.
- You will need to register for a free account to download.
- Firmware Downloads
- Run the executable and let it complete. Power down and unplug the system from power for 10 seconds. When you power it back up, the new firmware will be active.
Accessing the SIM card
The modem has its own SIM slot on the bottom side. This is the preferred location to install a SIM card. OnLogic installs all SIM cards here by default.

- First, use the search box at the top of this site to locate the technical resources page for your model.
- “ML350” for example.
- Disassemble the PC to gain access to the modem
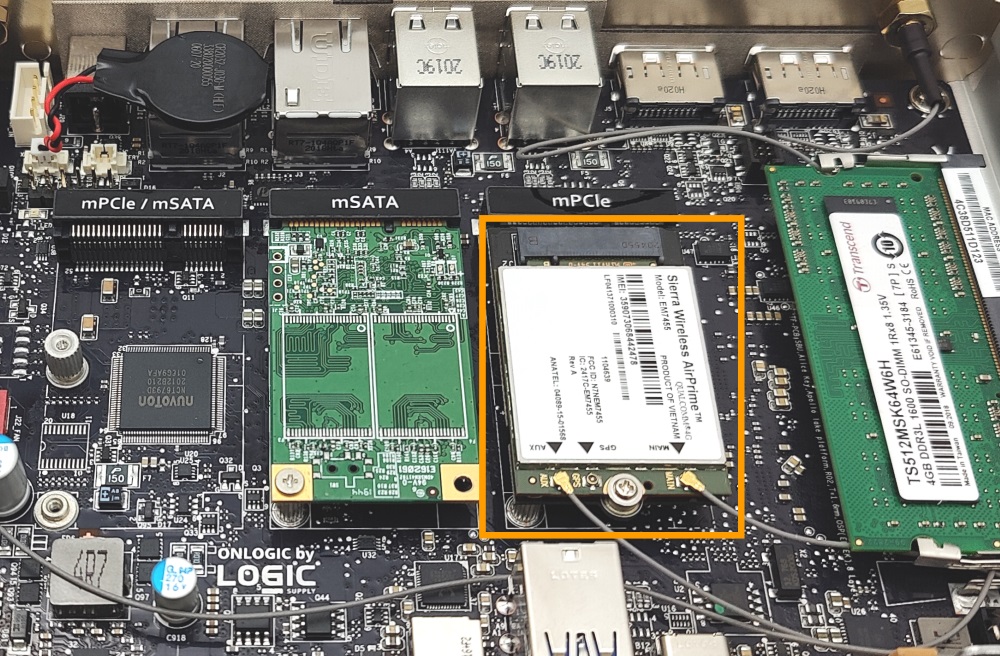
- Once inside, locate the Sierra Wireless Modem
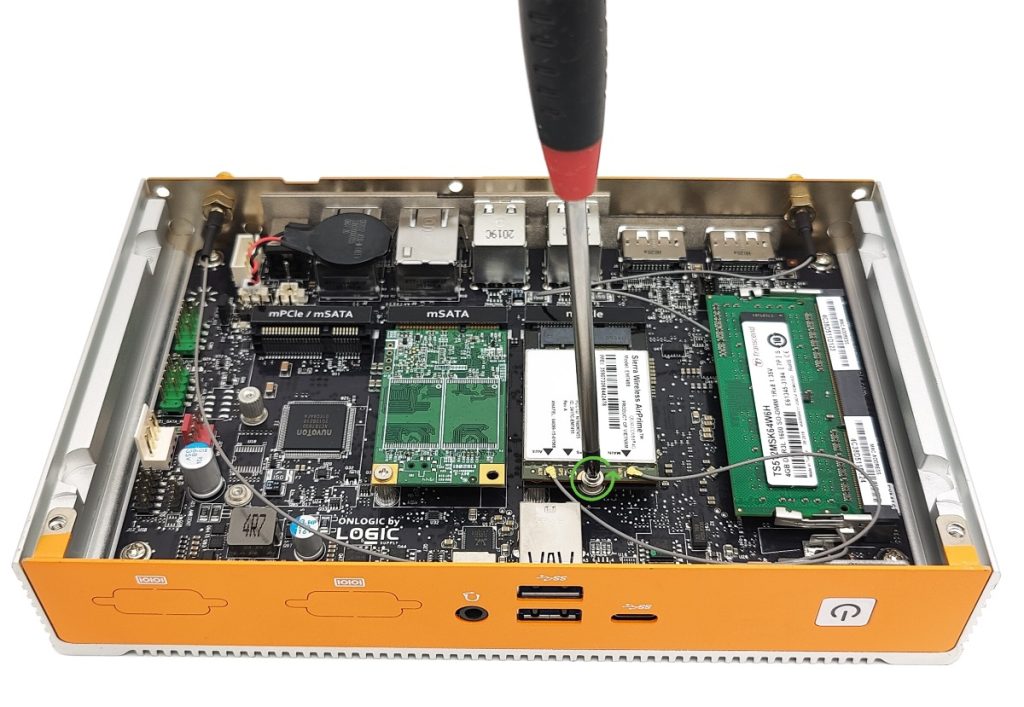
- Remove the 1x retaining screw from the center
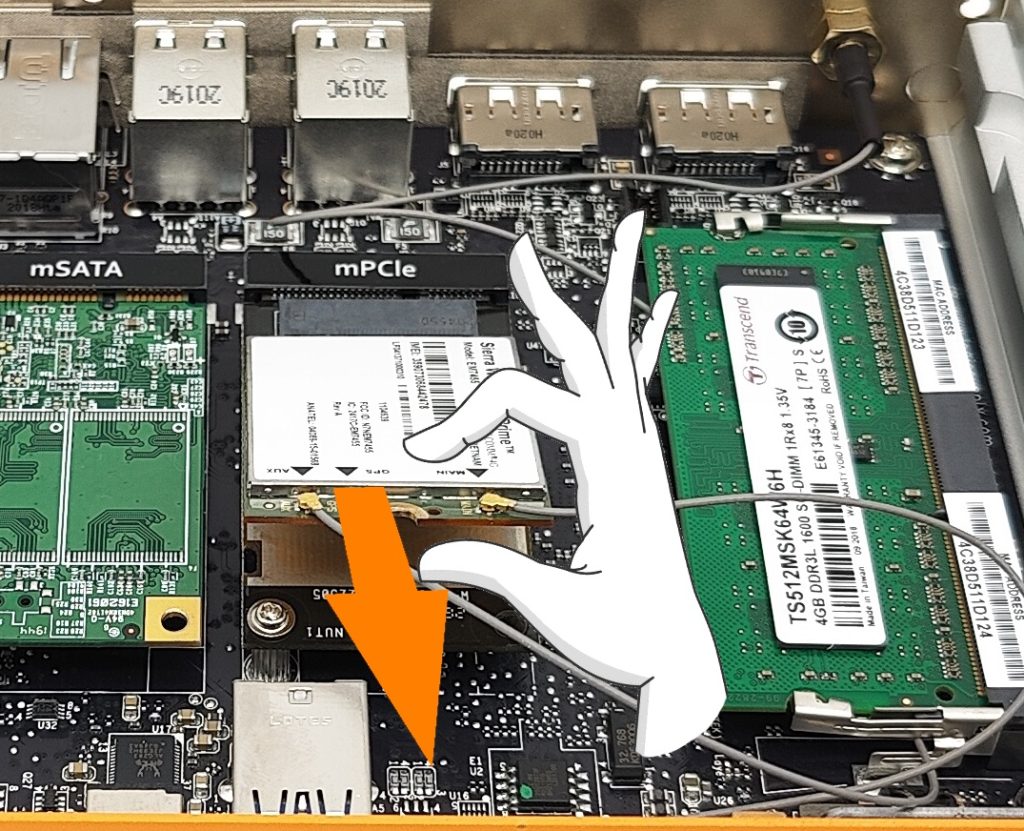
- The modem will pop up to a 45 degree angle. Gently pull it out of the slot.
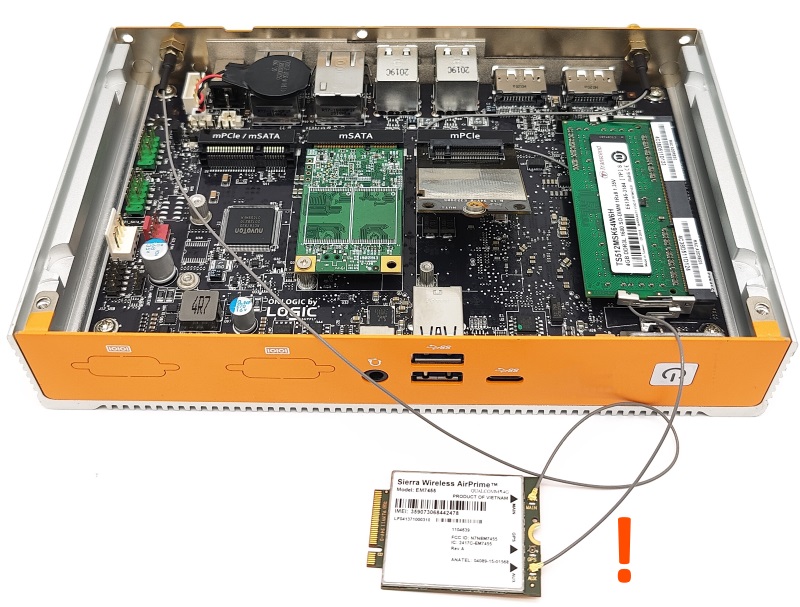
- Set the modem aside and be careful not to disconnect the antenna wires.
- They are tiny and difficult to reattach.
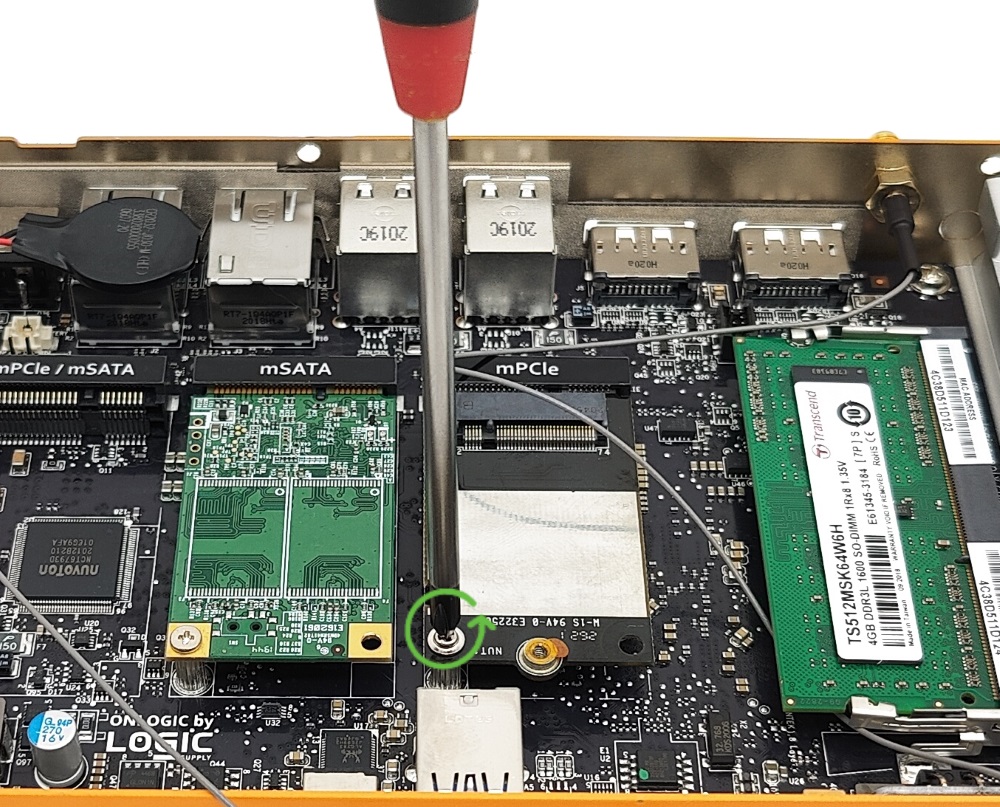
- Remove the retaining screw from the carrier board that was underneath the modem.
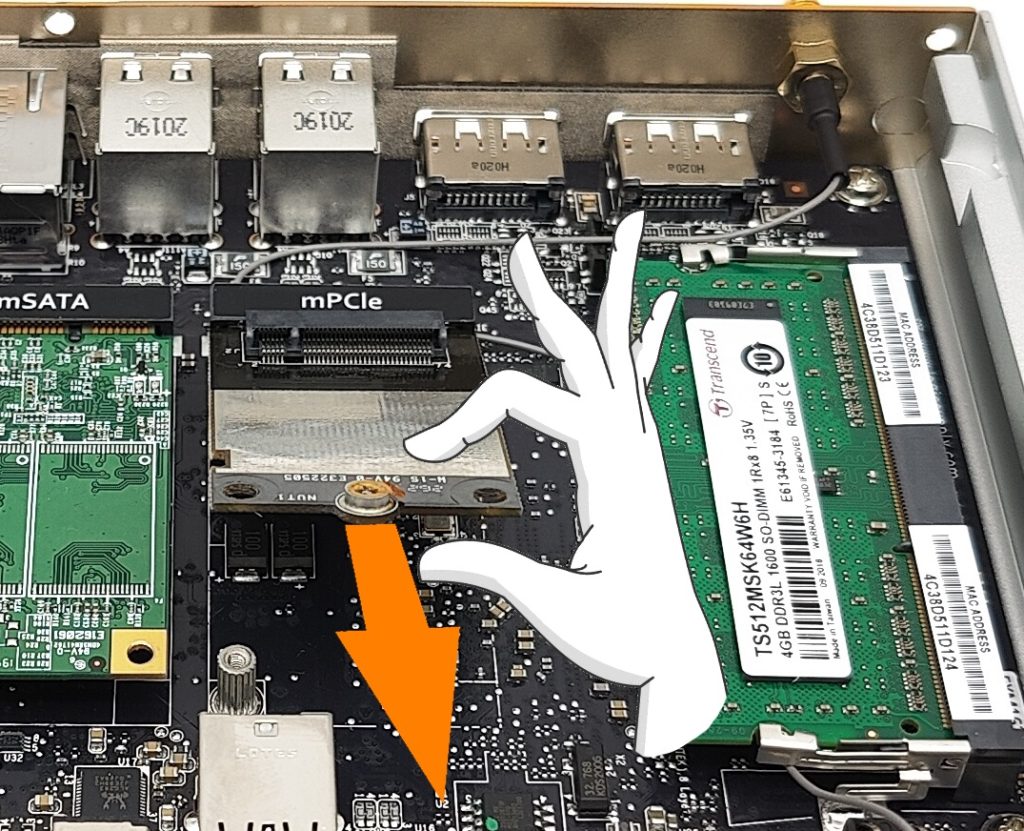
- Gently pull the carrier board out of the slot as you did with the modem.
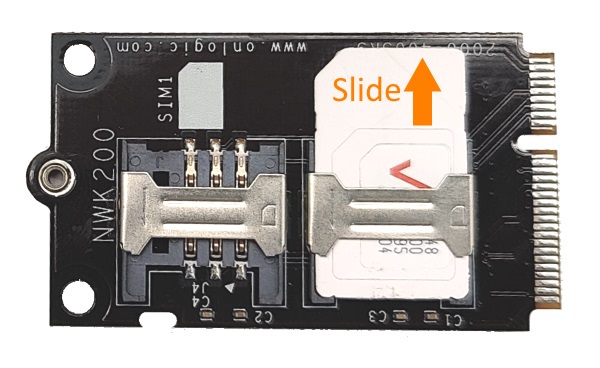
- Flip the carrier board over. The SIM slots are located on the bottom.
- The retention bar is fixed in place. Slide the SIM card in and out.
Using the external SIM slot
The NWK200 comes with two built-in SIM slots. It does not have any provision for automatic SIM switching, so a user must intervene in order to change SIMs. SIM slot 1 on the card connects to UIM0 on the modem. SIM slot 2 on the card, or any motherboard or external slot, connects to UIM1.
- Open an AT command terminal by following the instructions in the Opening the AT Command Terminal section.
- Run the following commands in the AT terminal:
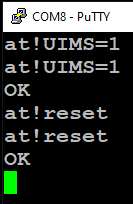
AT!UIMS=1
AT!RESET- Reboot the PC, and the correct SIM slot will now be active.
Changing NWK200 SIM Slots
The NWK200 comes with two built-in SIM slots. It does not have any provision for automatic SIM switching, so a user must intervene in order to change SIMs.
Follow the instructions to open the AT command terminal.
SIM slot 1 on the card connects to UIM0 on the modem. SIM slot 2 on the card, or any motherboard slot, connects to UIM1.
To select the “operating” SIM slot, run:
- AT!UIMS=n Where n is 0 or 1
A password is not required for this command. If an error is received switching to UIM1 then it is currently disabled (likely by a modem reset).
Use AT!CUSTOM=”UIM2ENABLE”,1 to enable UIM1.
Hot-swapping a SIM card (e.g. via external slot) may reset the selected UIM at which point it will have to be configured correctly again.
Troubleshooting
Before performing any troubleshooting, ensure you have completed all steps in this article and have activated your SIM card.
- If no connection is established after 5 minutes, open Putty and run the following 2 commands. Note that the COM port number may change after switching firmware. You may need to check /dev and adjust Putty accordingly.
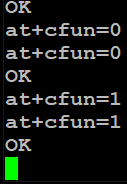
AT+CFUN=0
AT+CFUN=1
This will place the modem into airplane mode and then take it out of airplane mode, effectively forcing it to retry connecting to the cellular network.
Diagnostic AT Commands
- Open an AT command terminal by following the instructions in the Opening the AT Command Terminal section.
The commands below can help diagnose various modem issues. Tech support may request screenshots of the output of each of these commands. If you have reached this point and require additional help, please email support@onlogic.com and include a copy of these screenshots as well as your system serial number.
| AT!ENTERCND=”A710” | Enters the password for certain password protected commands. |
| At!impref? | Display active firmware version |
| AT+CSQ | Display signal quality. Scale from 0-31, 31 being best signal. 99= no signal |
| AT+ICCID | Print SIM card number. If error, SIM is not configured correctly or installed. |
| At+cgdcont? | Shows the active APN |
| AT!GSTATUS? | Prints general status info |
| At+cgact? | Checks if paths to the network are active. Should output 1,1 |
| AT+CGSN | Prints the IMEI of the modem |
| AT!PCINFO | Return the modem’s power control status. |
Insert SIM Error
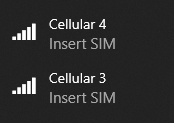
- Verify that a SIM card has been installed and is oriented properly.
- If using the external SIM slot, follow these instructions: #Using the external SIM slot
Poor upload speed on Verizon
If good download speeds but low/zero upload speeds are encountered on the Verizon network, try setting the MTU manually for the wireless interface.
Open a terminal and run the following two commands:
sudo ip link set dev wwan0 mtu 1428
sudo ip link set dev wwan1 mtu 1428
Known limitations
- The GPS functionality is not supported by OnLogic.
- SMS (text messaging) is not supported on the VZW firmware image
- Static IP assignment depends on carrier network and may not be possible or consistent
