Basic RS-232 Setup
Begin Basic setup by determining the pinout of the devices that will be connected.
In this example we will connect a K300 running Ubuntu to another K300 running Windows 10.
Using the K300 Manual, we can determine that the Transmit (Tx) pin is 2, the Receive (Rx) pin is 3 and the Ground (GND) pin is 5.

Before connecting the two devices we can run a loopback test to determine the address of the physical port we are using.
This can be done using a COM loop back device, or by using jumper cables to connect the Tx pin to Rx pin and the GND pin to a ground source. Please note it is best practice to use another COM port’s GND pin to ground the port running the loop back test. In a pinch, the COM port’s shield can be used, but it is not guaranteed to be a viable ground point and may result in communication issues.

Once the loop back is made, PuTTY can be used to send simple communication over the port to determine how the physical port enumerates in the OS.
Windows
Using Putty open up a COM port and type in the terminal window.


- Your keystrokes should print out in the terminal window. If they do not, use PuTTY to open up another COM port number
- This tells us that the COM port our loop back is plugged in to is “COM1” in the Operating System.
Linux
In Linux download and install PuTTY. You may need to run PuTTY with elevated privileges. Open up a /dev/ttyS0 port and begin typing in the terminal window.
sudo apt install putty
sudo putty


- Your keystrokes should type out in the window. If they do not, run putty with a different /dev/ttyS address. Try 1 or 2
- This determines the port we have our loopback plugged in to is at /dev/ttyS_
Communication between devices.
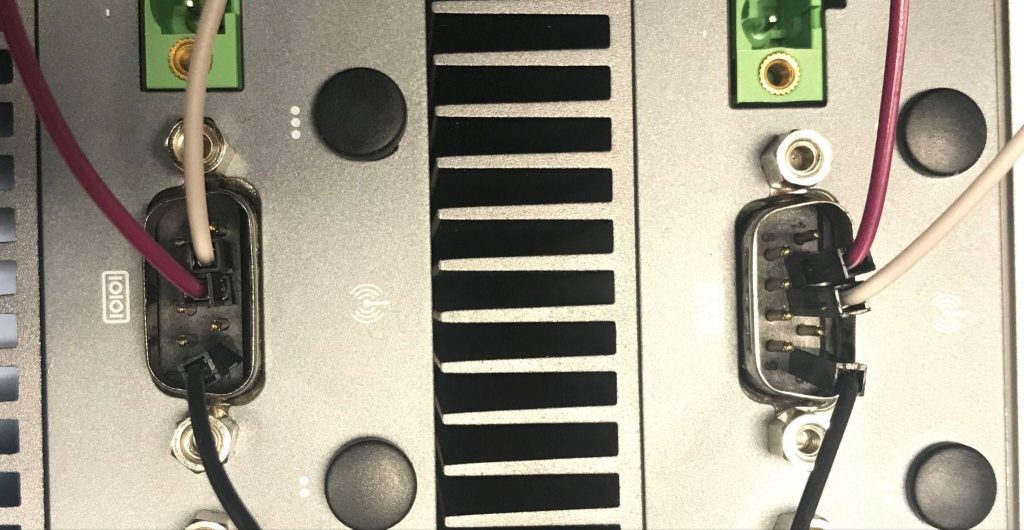
When connecting to a device it’s important to verify pinout between devices against the pinout of the cable in use.
Using the pinout of the two devices, verify that the cable is connecting Tx to Rx and also connecting ground.
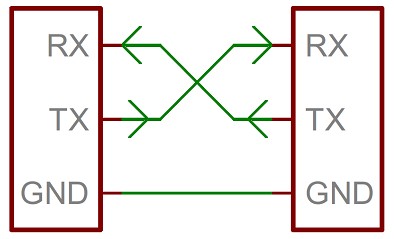
- This example is using jumper cables to show the pinout connection between devices

Once the cable pinout is verified and the cable is connected to both devices, PuTTY can be used to send information over the port.
Device settings
It’s important that the following settings between both devices match. If the settings differ between devices, the data sent will have errors on the receiving device.
Baud Rate
Data Bits
Stop Bits
Parity and Flow control are optional settings.
Setting up COM communication in Linux
In Ubuntu we can use PuTTY to open up the /dev/ttyS0 device path we ran the loopback test on.
also take note of the serial configuration of this PuTTY serial session.

Setting up COM communication in Windows
Opening PuTTY the com port we ran the loop back test on can be opened and the settings can be checked to make sure they match the configuration of the Ubuntu system’s COM settings.

Sending data between devices
Once the PuTTY terminal is open on both systems, data can now be sent between devices.
On the Windows PuTTY terminal, keystrokes will appear in the Linux PuTTY terminal.

On the Linux PuTTY Terminal, keystrokes will appear in the Windows PuTTY terminal

Conclusion
Although this example used 2 K300 systems, the overall principals apply for setup and troubleshooting any serial communication line.
- Determining software port to use for specific physical port
- Ensuring port works with loop back
- Determining pinout of port
- Ensuring cable’s pinout matches device’s pinout and Tx pins are going to Rx pins between devices
- Ensuring communication settings between devices match.