Drivers and Manuals
Hardware Installation & Maintenance Manual
LPMCU Tool
DIO Python Package
Repository Link – onlogic-m031-manager
Download Instructions
- Download .zip File | For a simple copy of the files, use this direct download link:
- Clone with Git | Use a terminal to clone the repository.
- HTTPS:
git clone https://github.com/onlogic/onlogic-m031-manager.git
- SSH:
git clone git@github.com:onlogic/onlogic-m031-manager.git
- HTTPS:
Drivers
Drivers are available in INF formats, which can be installed via a Windows deployment server, or through the Device Manager. Follow our guide for Installing via Device Manager here.
Windows 11 – Download
BIOS Updates
| Version | Link |
|---|---|
| Z01-0009S011 | Download |
Frequently Asked Questions (FAQ)
The MXM GPU that is installed in the HX525 system only supports an active DisplayPort signal and will not work with passive adapters or signal splitters. You will need to use an active adapter to convert the video signal. These use a chip to boot the conversion performance, which help to eliminate video issues. A video adapter without the additional chip circuitry is a passive adapter, which only work for some conversions and are not supported on the MXM GPU. Generally, DisplayPort adapters will need an active adapter to convert to VGA, DVI, or HDMI connections. Active adapters can be readily found online.
Here is a list of the operating systems that we have validated and will support on these systems:
– Windows 11 Professional
– Windows 11 IoT Enterprise 2024 LTSC
– Windows 10 IoT Enterprise 2021 LTSC
– Ubuntu 24.04 Desktop LTS64-bit
– Ubuntu 24.04 Server LTS 64-bit
– Ubuntu 22.04 Desktop LTS64-bit
– Ubuntu 22.04 Server LTS 64-bit
Disassembly Instructions
Properly opening OnLogic systems does not void the warranty in most cases, however, some precautions are necessary to avoid damaging the system. Please be sure to properly ground yourself before working on the internal components of the systems.
All of the different system models in this series begin their disassembly by removing the bottom plate:
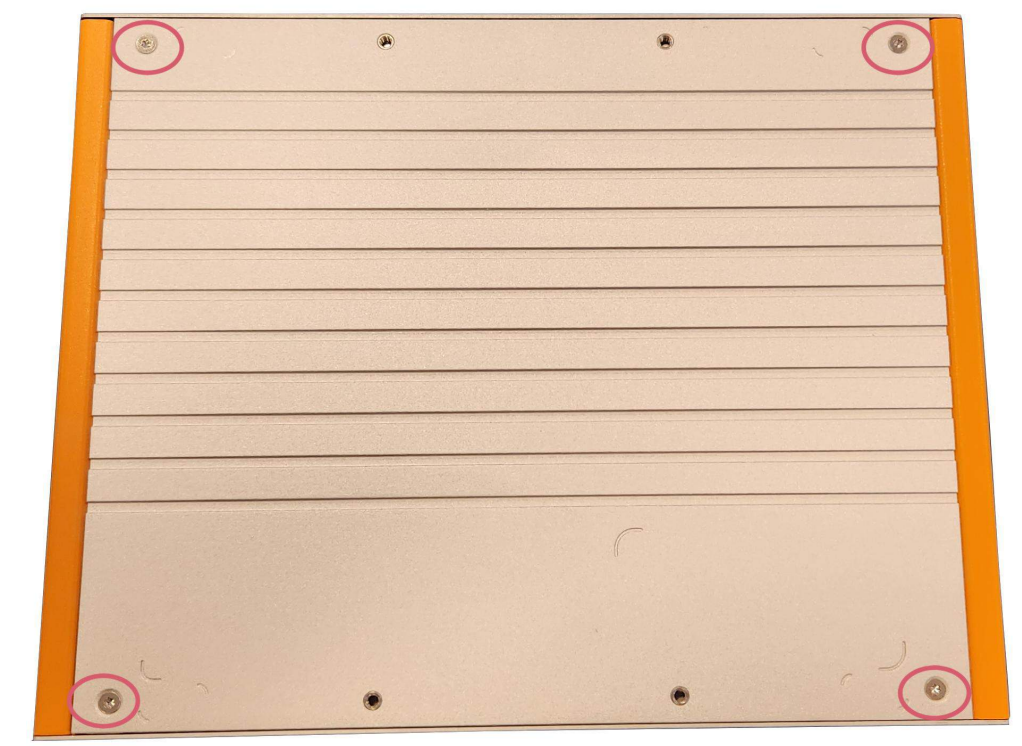
- Begin by removing the four screws from the bottom plate, shown here
HX521 Disassembly
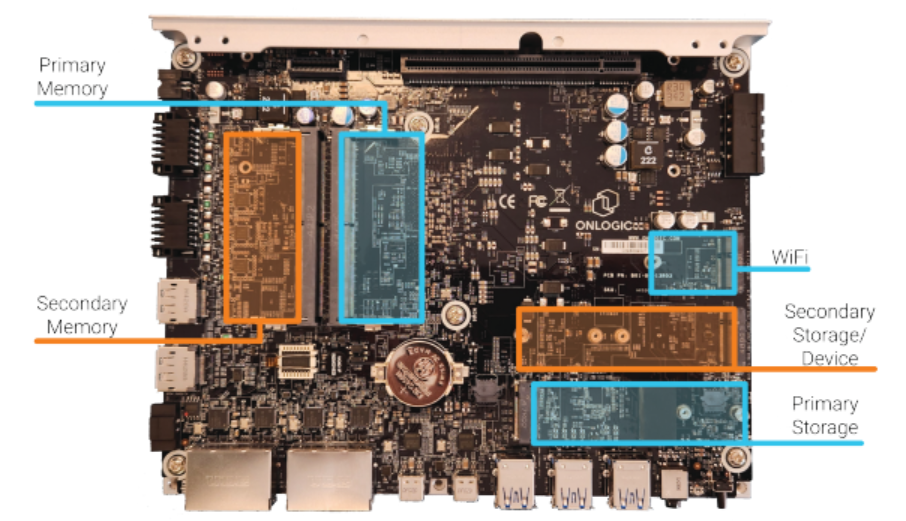
After removing the bottom plate, you will have access to the motherboard. The motherboard used is the same for all variants in this series. Here is the layout:
HX522 Disassembly
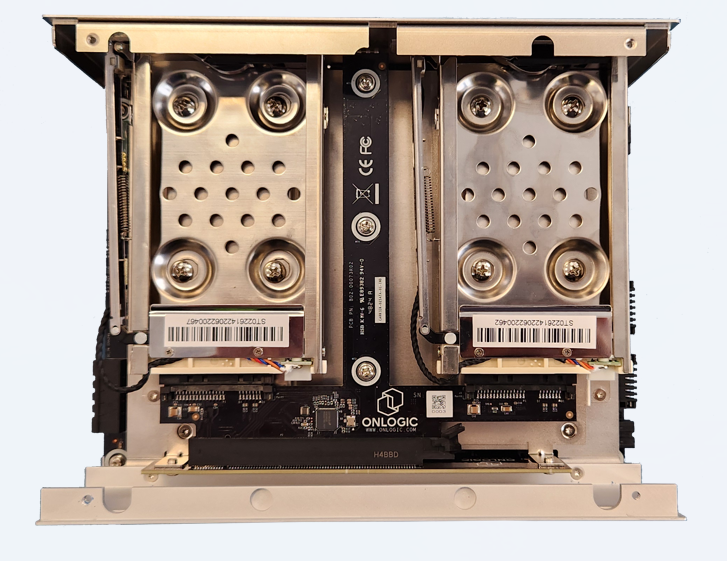
- You will now have access to the hot swap bay section of your system
- Further disassembly is possible but not recommended. Please contact Technical support before continuing
HX523 Disassembly
- You will now have access to the modbay section of your system
- Further disassembly is possible but not recommended. Please contact Technical support before continuing
HX524 Disassembly
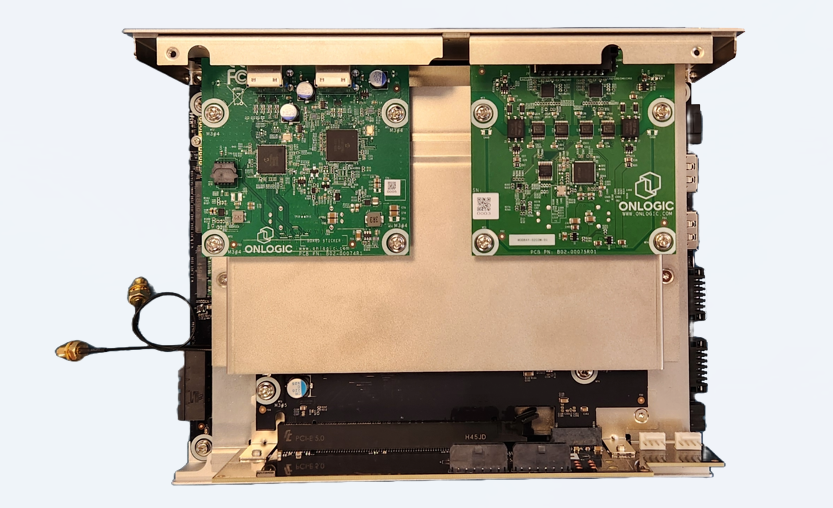
- You will now have access to the PCIe expansion section of your system
- Further disassembly is possible but not recommended. Please contact Technical support before continuing
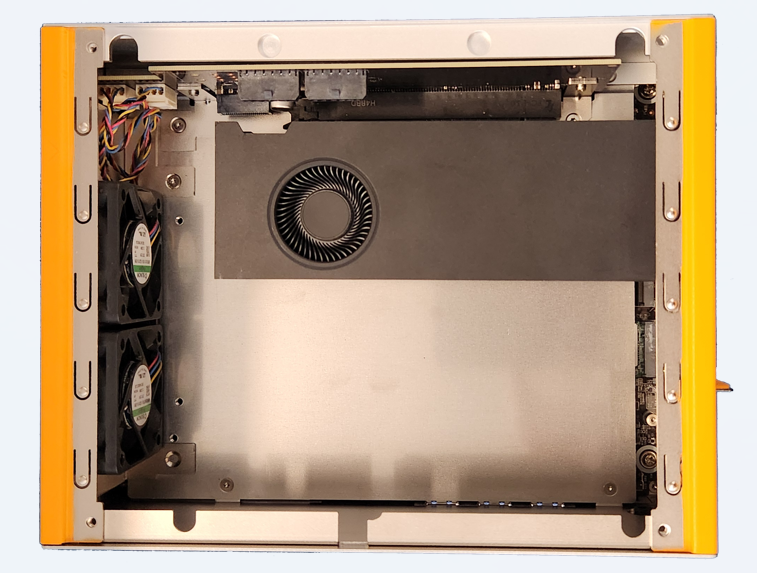
HX525 Disassembly

- You will now have access to the PCIe expansion section of your system
- Further disassembly is possible but not recommended. Please contact Technical support before continuing
Troubleshooting
Clearing the CMOS
If the system fails to power on or is unresponsive, clearing the CMOS may help. It will also restore the BIOS to factory defaults.
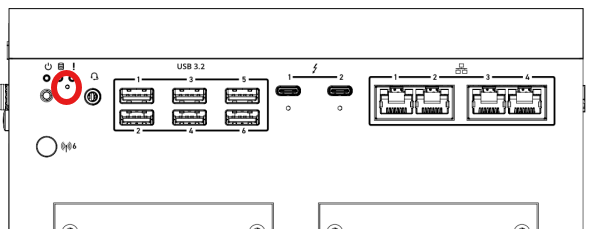
- The CMOS reset button on all HX52X systems can be found next to the power button, as indicated here
- To perform the reset, begin by powering off the system
- While holding the reset button, press power button to power the system on
- After 5 seconds, release the button
- The screen will show “System will reboot to reset to default.” and will prompt the user to press “ok”
- The system will reset
- The reset to default completes