Drivers and Manuals
Enabling Auto Power On
The system can be configured to turn on automatically when DC power is connected. This is useful for power outage recovery or if the unit is mounted in a hard to reach location. You can enable Auto Power On by following the steps listed below.
- Power up the system and press the F2/Del keys a few times to access the BIOS
- Navigate to the Chipset tab and locate the “Restore AC Power Loss” option
- Change it to [power on]
- Press F10 to save and exit
- Auto power on is now enabled.

Troubleshooting
Clearing the CMOS
If the system fails to power on or output video, clearing the CMOS can often help. To clear the CMOS, the system needs to be opened and an internal switch needs to be pressed.
Opening the system does not void the warranty, however, some precautions are necessary to avoid damaging the unit. Any damaged caused will not be covered by warranty.
- Perform this disassembly in an area free of static discharge
- Before beginning, touch a grounded metal surface to discharge your body of static electricity
- Power off and unplug the system. Disconnect all ports.
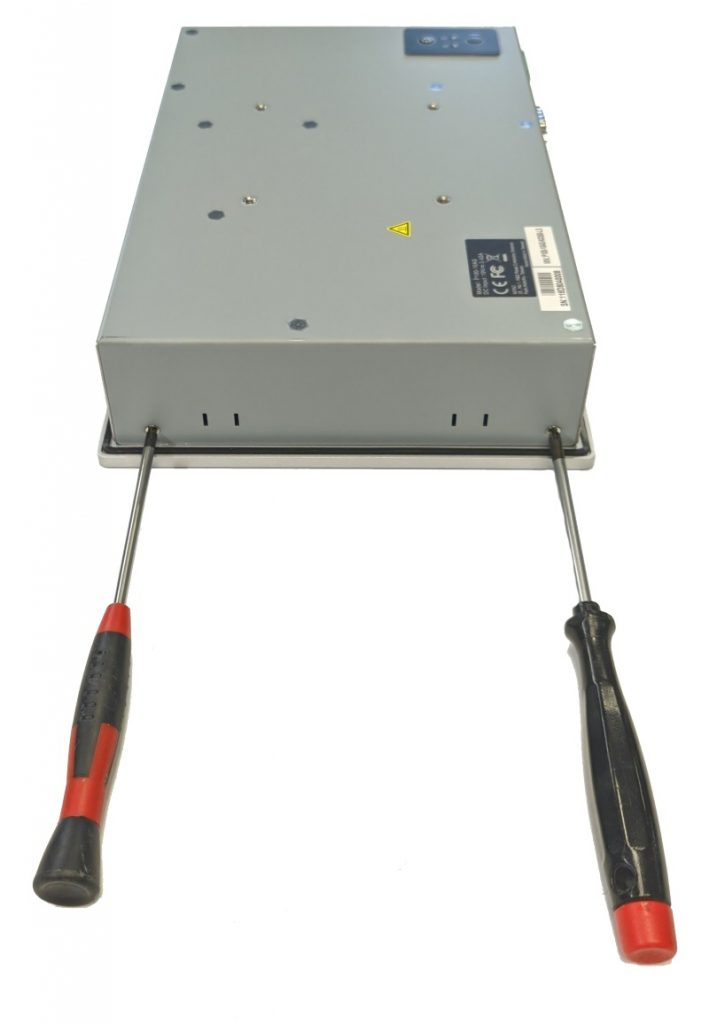
- Remove 2 screws from both short sides of the case – 4 screws total.
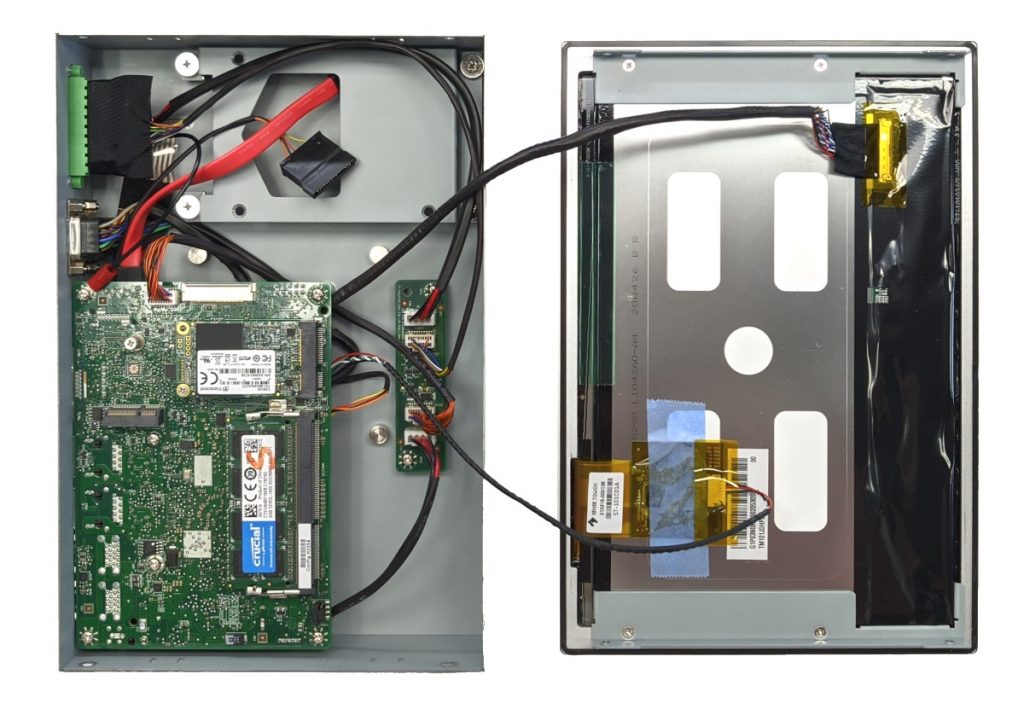
- Lift the screen and case apart.
- Use caution as cables will still be attached. Keep the two halves close.
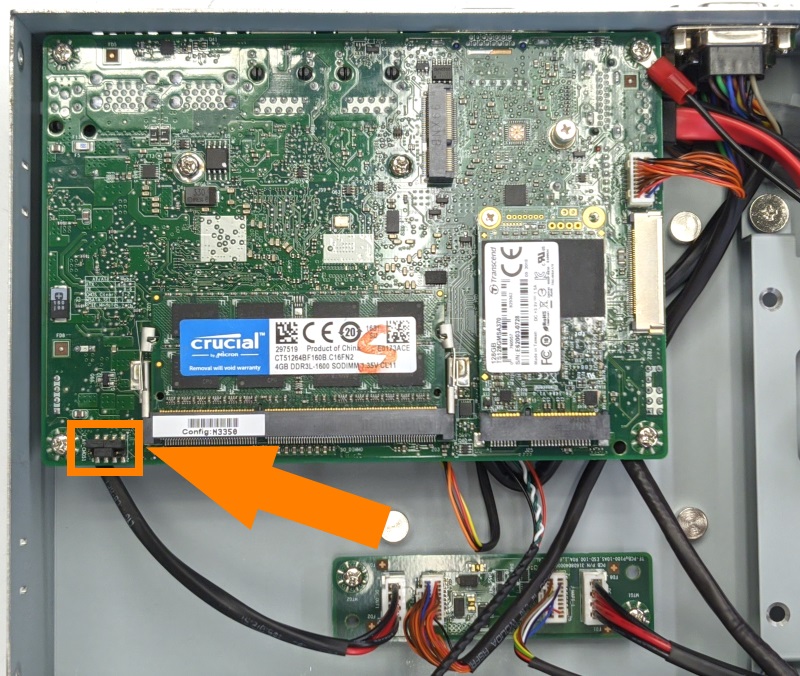
- Locate the jumper blocks
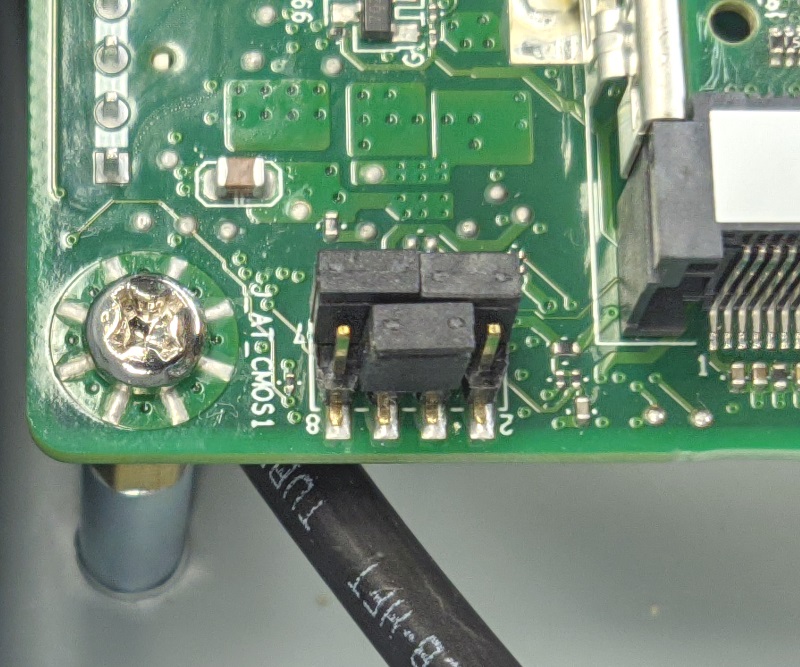
- This is the default position.
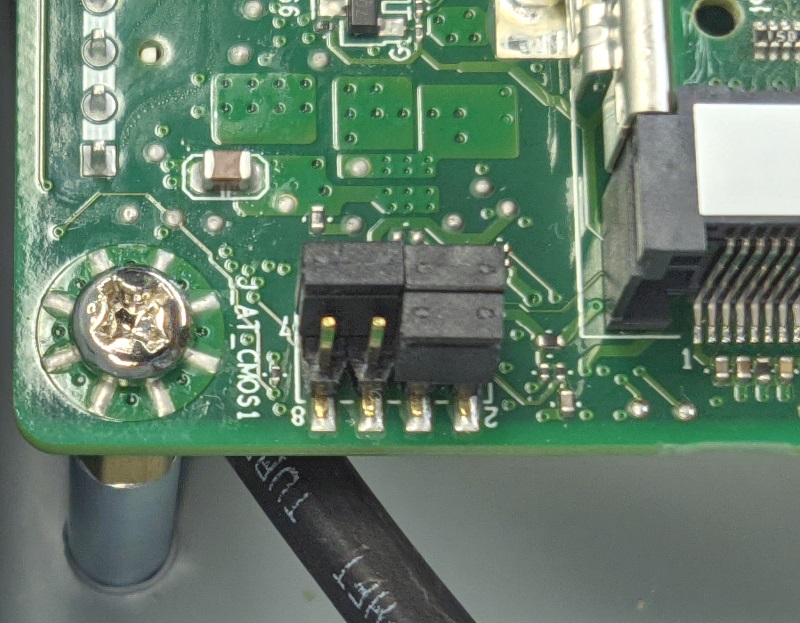
- Move the outermost jumper over by 1 pin as shown
- Wait 30 seconds
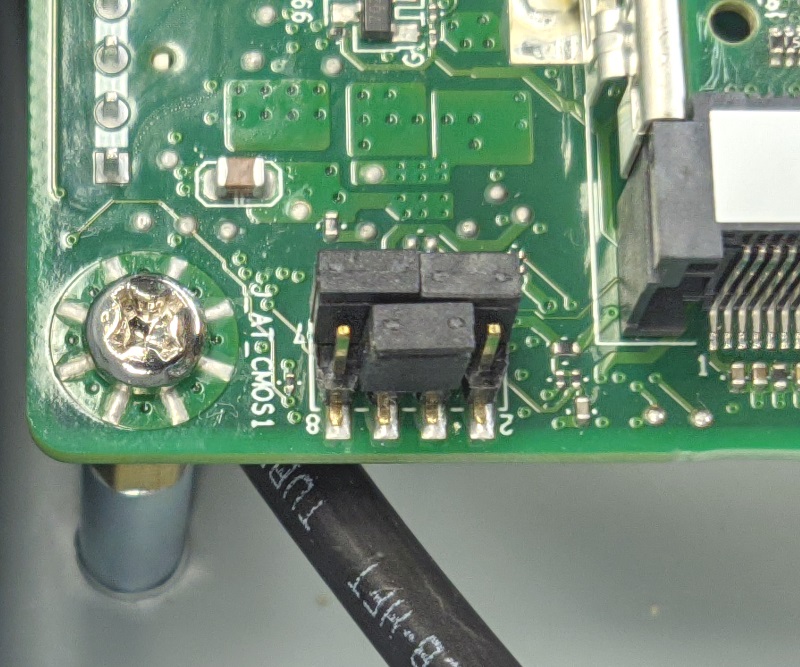
- Restore the jumper to its original position.
- The CMOS is now clear.
- Re-assemble the unit and power it on. Be patient as it may take several minutes to re-configure itself.
- If it is still non-responsive after 5 minutes, contact technical support.
