Prerequisites
- An 8GB or larger flash drive (USB 3.0 model recommended for speed)
- A PC running Windows 10 or 11
- The Media Creation Tool, downloadable from here.
- The RAID driver, downloadable from here.
Creating the flash drive

- Download and run the Media Creation Tool, linked above

- Accept the license agreement

- Click Next

- Choose the “USB flash drive” option and click Next

- Choose your flash drive from the list and click Next
- If the drive does not show, ensure it is formatted as FAT32 or try a different drive.

- The Windows 11 installer will now download from the Internet and make the flash drive bootable. This will take several minutes depending on the speed of your flash drive and Internet connection.

- When the tool finishes, click Finish to close it.

- Download the RAID driver (linked above)
- Extract the .zip file and copy the contents to the Windows setup USB flash drive.

- Safely eject the flash drive and unplug it from the PC.
- Insert the flash drive into the K800
Enabling RAID
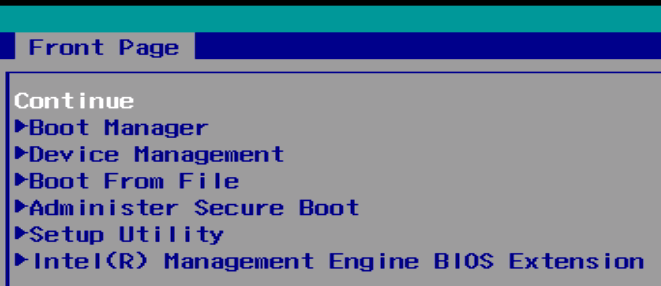
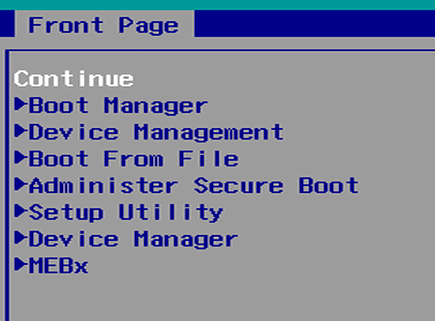
- Begin by powering on the K800 and immediately press the Del key a few times to access the menu
- Using the arrow keys, navigate down to “Setup Utility” and press enter
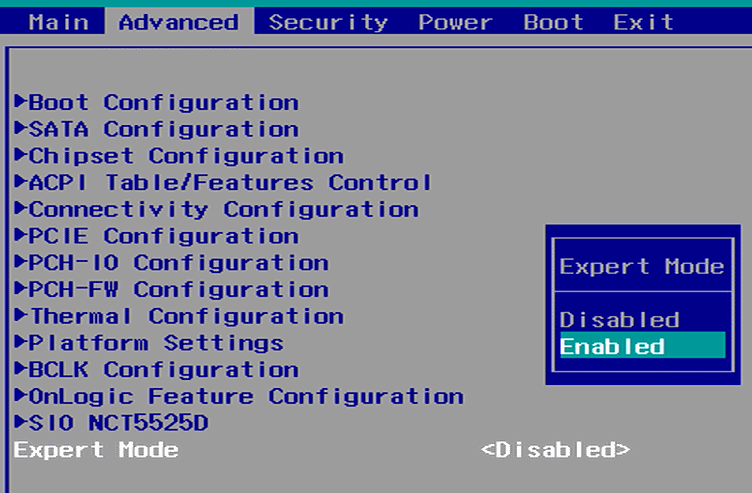
- Navigate to the “Advanced” tab
- Set “Expert Mode” To “Enabled”
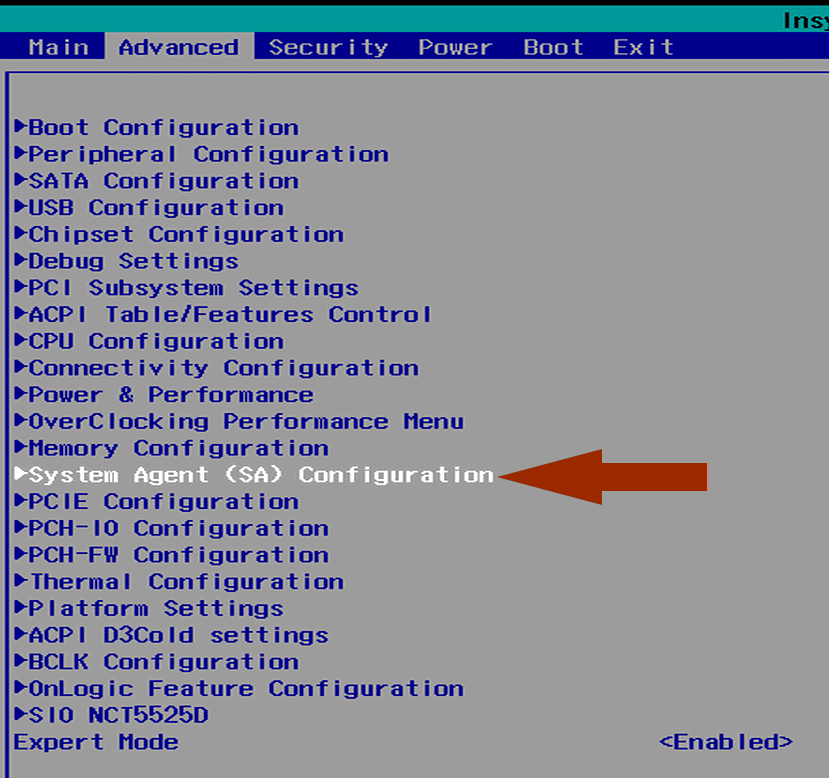
- Open the “System Agent (SA) Configuration” menu
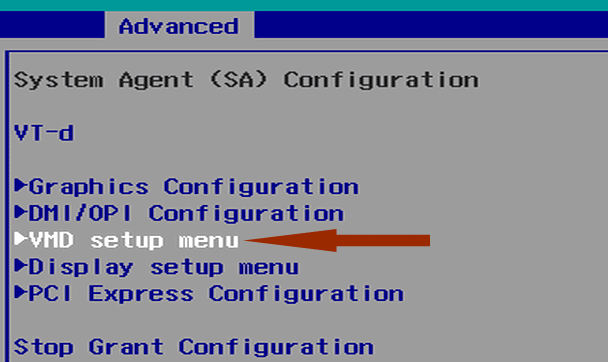
- Open the “VMD setup menu” menu
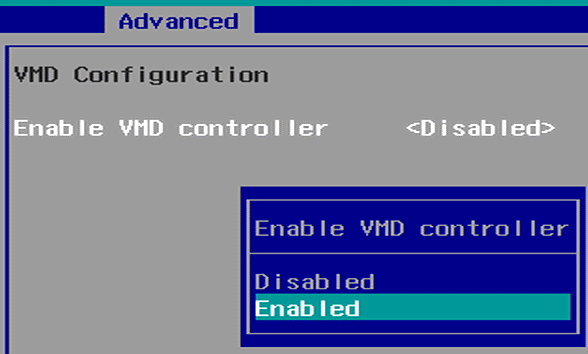
- Set “Enable VMD Controller” to “Enabled”

- Press F10 to Exit Saving Changes
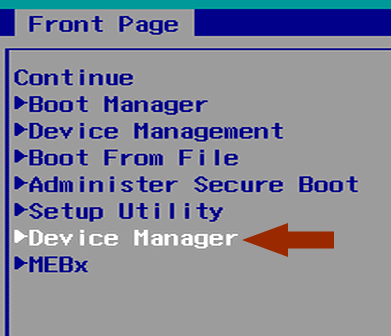
- Tap the Del key again and go back to the “Front Page” menu
- Enter the “Device Manager” menu
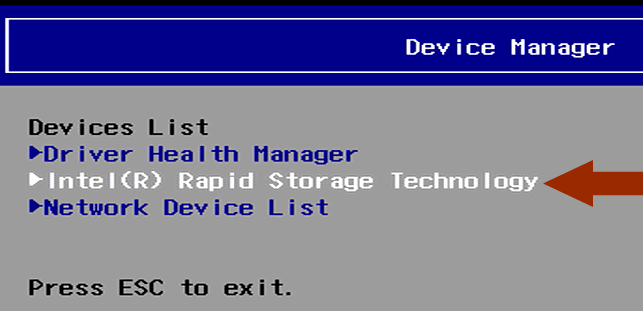
- Enter the “Intel(R) Rapid Storage Technology” Menu
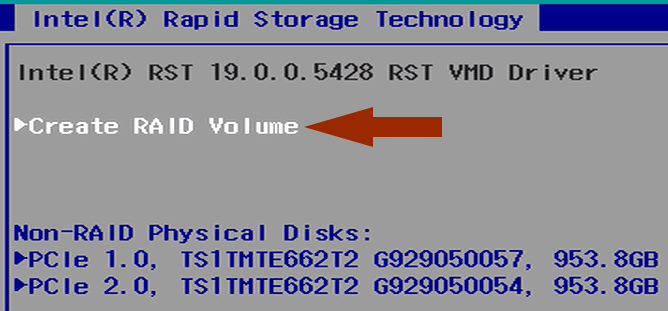
Choose “Create RAID Volume”
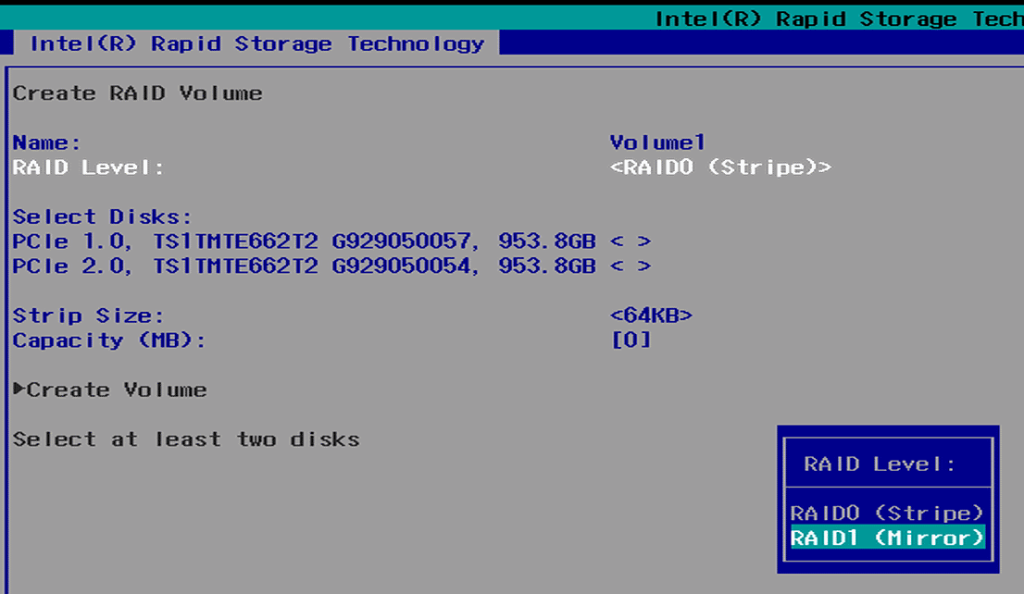
- Set the “RAID Level” to “RAID1 (Mirror)”
- RAID0 is supported but generally not recommended as there is no redundancy.
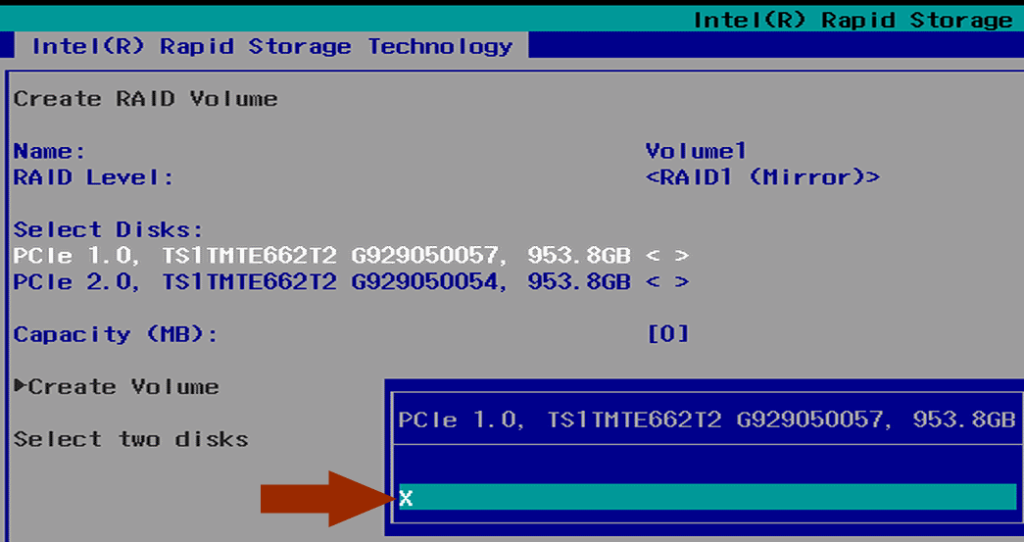
- Press enter on each disk and select the X to select it for RAID.
- You must choose at least 2 disks and they should be of the same size/type.
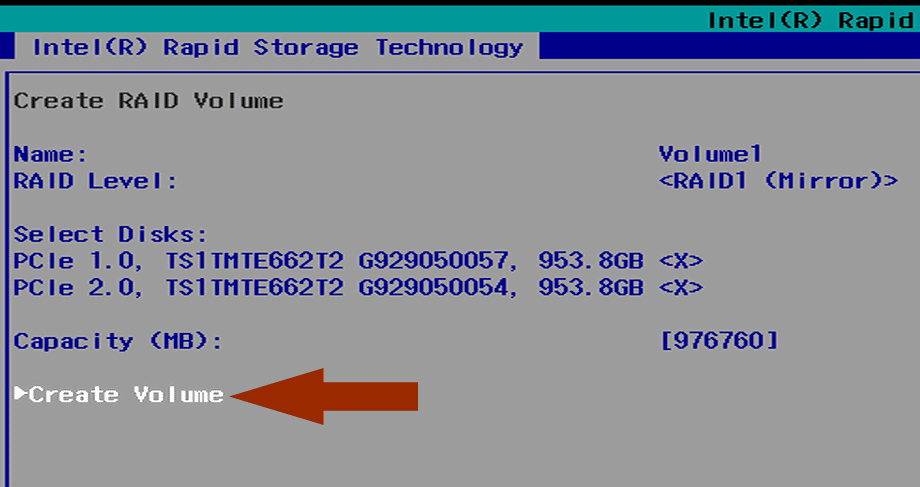
- Choose “Create Volume”
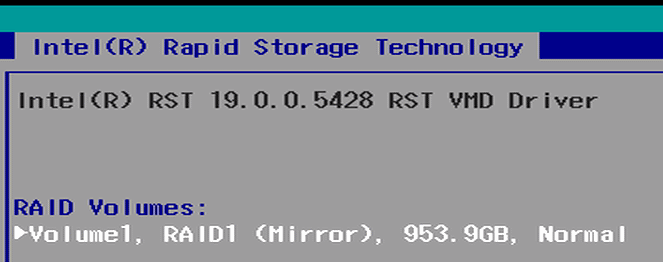
- Creation is very quick. You will now see the RAID volume listed with status “normal”
- Press F10 to save (the system will not give any feedback)
- Press escape to go back to the “Front Page”
- Select “Continue”
Installing Windows
- If you have not done so already, make sure the flash drive you created earlier is connected to the K800 PC.
- Boot from the flash drive.
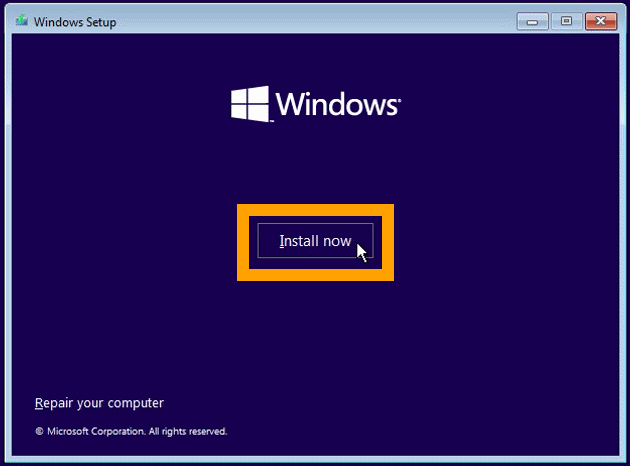
- When the flash drive boots, you will be presented with this screen.
- Click “Install now”
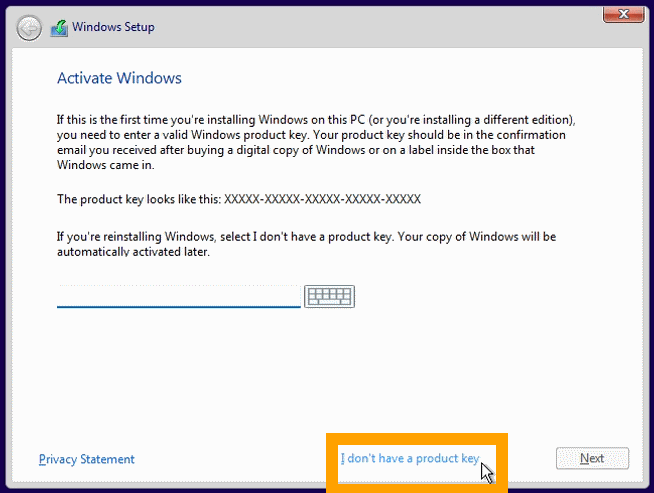
- Enter the product key from the bottom of your OnLogic PC and click Next.
- You can skip this step and enter it later if preferred. Click “I don’t have a product key”
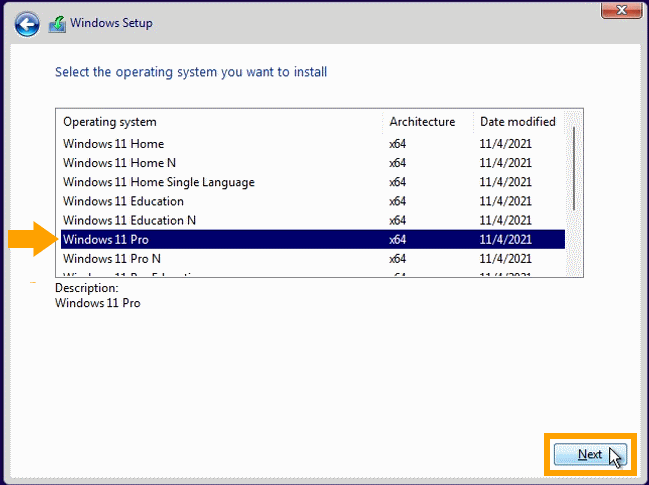
- If prompted (typically when you don’t enter a product key), select your version of Windows.
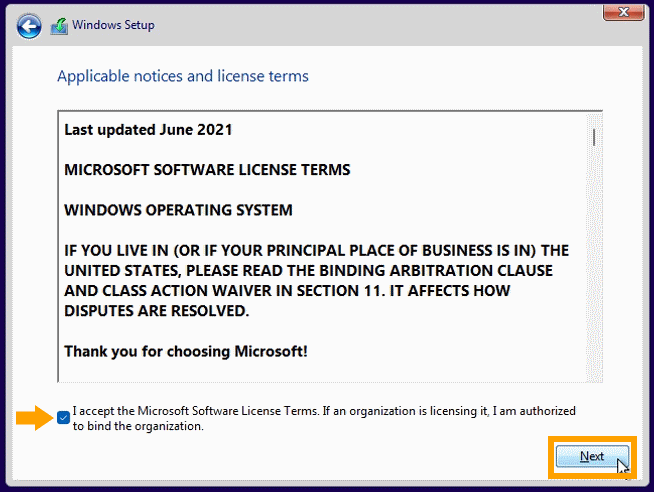
- Accept the license agreement and click Next
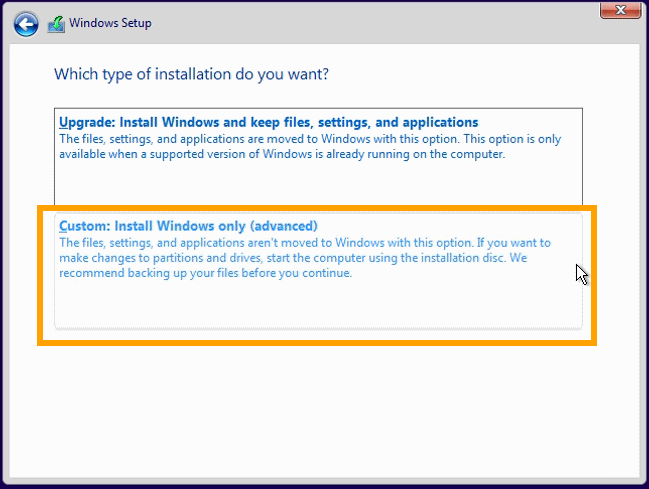
- Choose the option for Custom installation
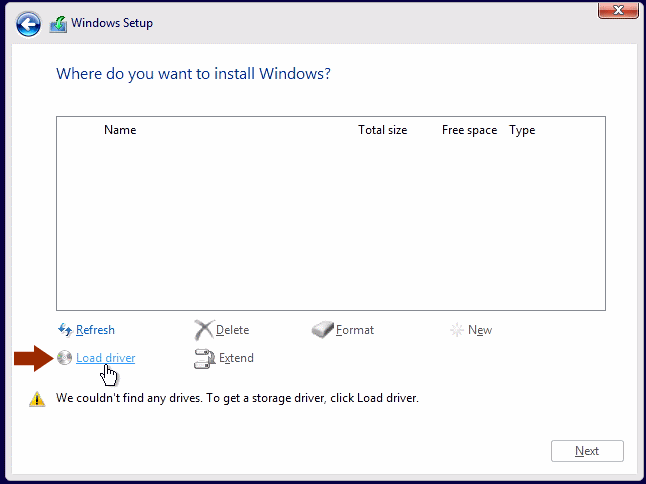
- Note that no storage drive will be detected at first
- Click on “Load Driver”
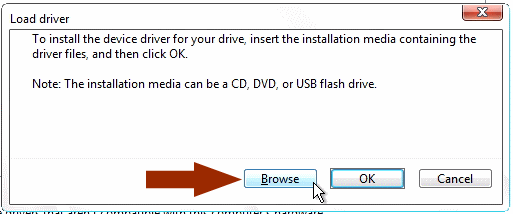
- Click “Browse”
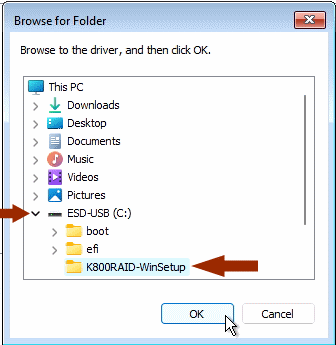
- Expand the USB drive and select the RAID driver folder you copied to the flash drive earlier.
- Click OK.
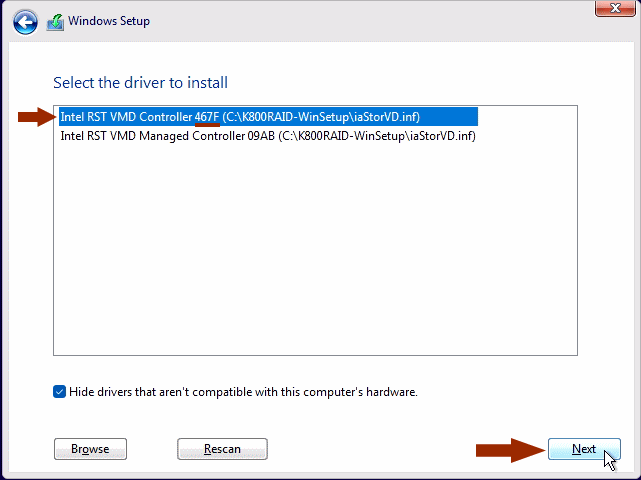
- Select the top option only (467F)
- Click Next
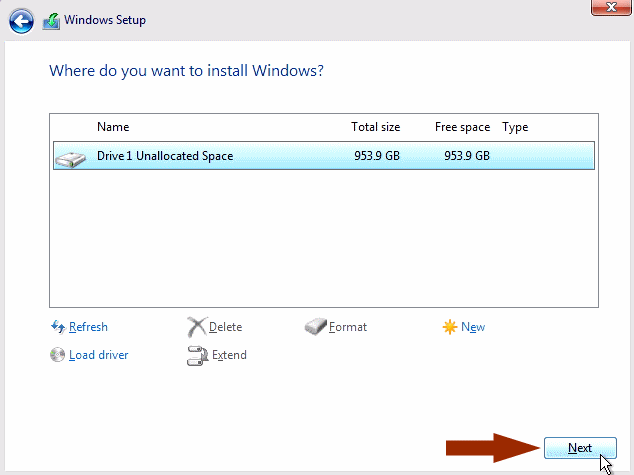
- After a few seconds of loading, you will be returned to the drive screen and the RAID volume will appear.
- Click “Next” to format it and proceed with the installation.
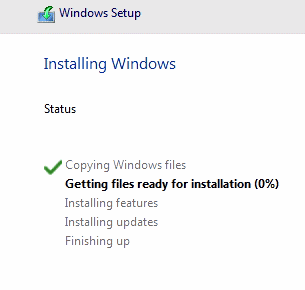
- The Windows installation will begin.
First Boot & Setup
Refer to our Windows 11 Setup Guide for the next steps.
