OnLogic currently does not initialize storage drives unless an operating system was installed on them. This means that additional storage drives will not show up out of the box. They need to be initialized and formatted in disk management first. This guide will show you how.

- Open the start menu and type in “management”
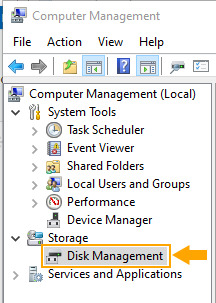
- Open Computer Management

- Click on Disk Management

- In most cases, this popup will appear automatically.
- Choose GPT and click OK

- If the popup above does not appear, scroll down and locate the “Not Initialized” disk. Right click on the disk number and Initialize it. The popup will now appear.

- Now that the disk has been initialized, you can create a volume and format it.
- Right click anywhere in the black “unallocated” space.
- Choose “New Simple Volume…”

- Click Next on the window that appears.

- Leave the number at the default and click next.
- This will create one partition that fills the entire disk – the most common configuration.

- Select a drive letter from the dropdown if desired. The default is fine.
- Click Next

- Format the drive
- File System: NTFS
- Enter a volume label if desired
- quick format
- Click Next

- Click Finish. The drive will start formatting and will show up under “This PC” within a few seconds.

- The drive is now ready for use.
