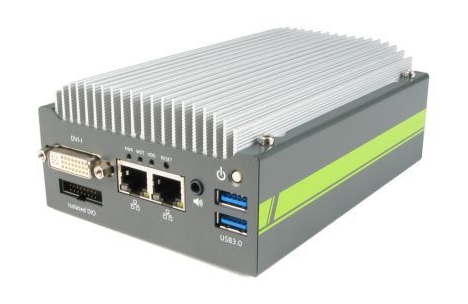
POC-200 Drivers and Manual
POC-200 Motherboard Manual
https://drive.google.com/file/d/1kM7QWXBpIBUIMY1t1JT6Mq7rrBHeRZYc/view
POC-200 Drivers
https://drive.google.com/drive/folders/1hPF6L2nVz_Hkrx1VD8-RovlMjkfItY8Q
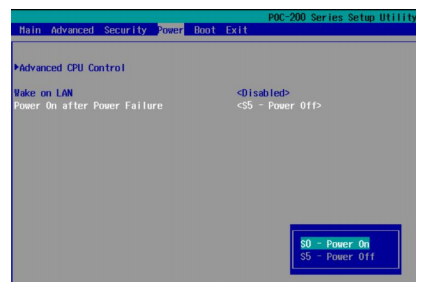
How to Enable Auto Power On
The POC-200 can be configured to turn on automatically. This is useful for power outage recovery or if the unit is mounted in a hard to reach location. You can enable Auto Power On by following the steps listed below:
- Power on the system and immediately press the F2 key a few times to access the BIOS.
- Navigate over to the Power tab.
- Change the option [Power On after Power Failure] to [S0 – Power on].
- Navigate to the Exit tab and choose “Save Changes and Reset”
POC-200 Hardware Troubleshooting
Opening the POC-200 does not void the manufacturer’s warranty. However, some precautions are necessary to avoid damaging the unit:
- Perform this disassembly in an area free of static discharge
- Before beginning, touch a grounded metal surface to discharge your body of static electricity
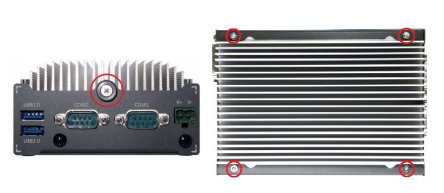
Opening the POC-200 Case
- Unscrew 4x hex bolts on the top of the heatsink.
- Unscrew 1x hex bolt from the side.
- Unscrew four M3 F-head screws on the bottom side.
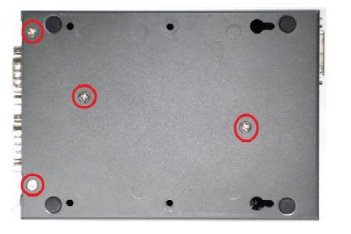
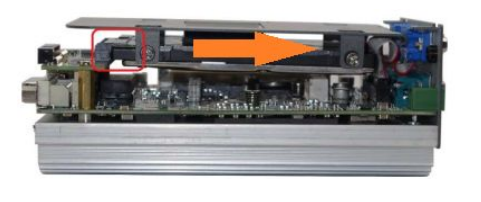
- Slide the bottom cover off.

- Pull the HDD out of its slot and remove the tray.
How to Clear CMOS
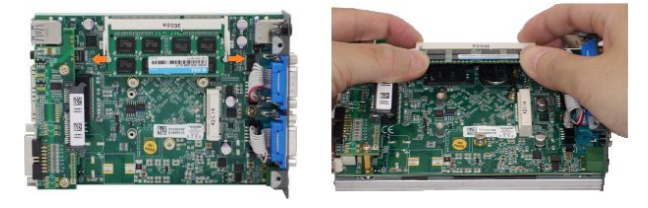
- Remove the RAM by pressing outward on the two metal clips.
- The module will pop up to a 45 degree angle and can be removed straight out of slot.
- Locate the CMOS battery.
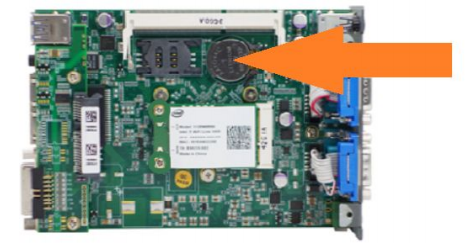
4. Remove the CMOS battery from the holder.
5. Wait 5 minutes.
6. Reinstall the battery. The CMOS is now clear.
7. Follow the instructions in reverse order to reassemble the unit.