The MK100 can be opened by the user. This does not void the warranty, however, any damage caused by doing so will not be covered.
The following steps will walk you through opening your MK100 case, as well as auto-powering on and clearing CMOS.
Find your MK100 unit or model name on the right panel, and click on it to see the instruction set for it.
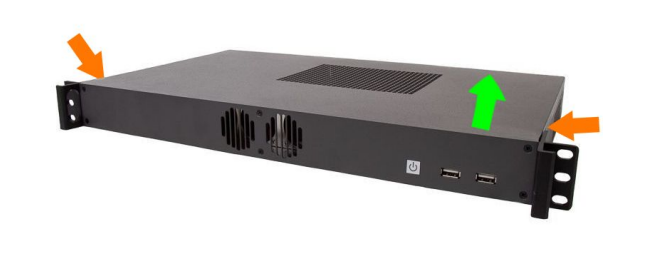
Opening the MK100 Case
The MK100 case is very simple to open. Remove the two screws from the sides and slide the lid off towards the rear.
Model Specific Troubleshooting
These flexible cases can accommodate a number of different motherboards. If you need to enable auto power on or clear the CMOS, locate your model on the right side and follow the instructions listed.
MK100B-50
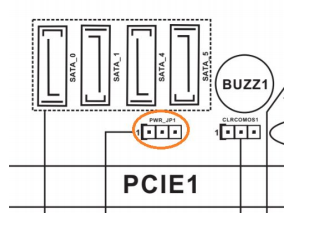
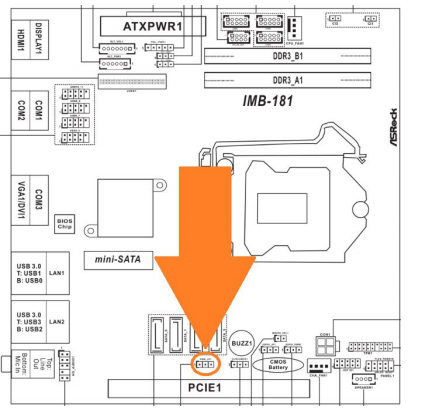
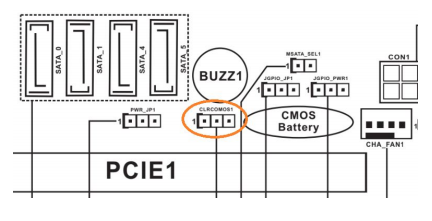
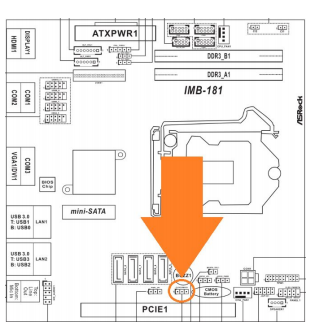
ASRock IMB-181 Motherboard
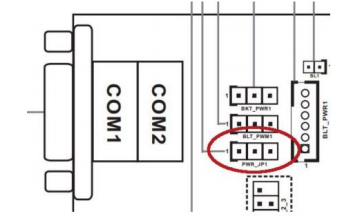
How to Enable Auto Power On
- Locate the AT/ATX jumper
- Move it over by 1 pin
- Auto power on is now enabled
Troubleshooting
How to Clear CMOS
- Unplug the system from all power and peripherals and perform the Opening steps above.
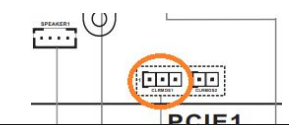
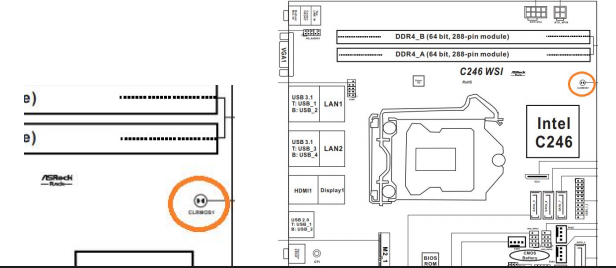
- Locate the CLRMOS1 jumper
- Move the jumper over by 1 pin
- Wait 30 seconds
- Restore the jumper to its original position
- The CMOS is now clear
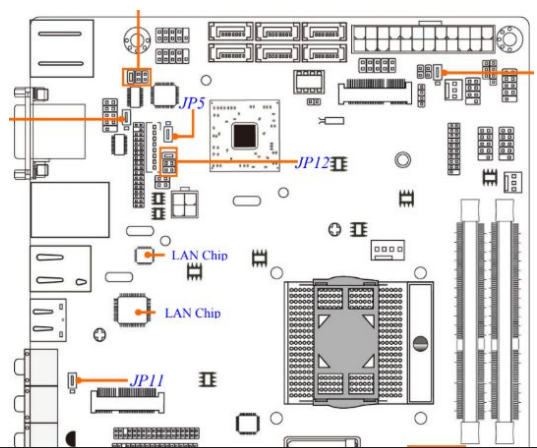
MK100B-51
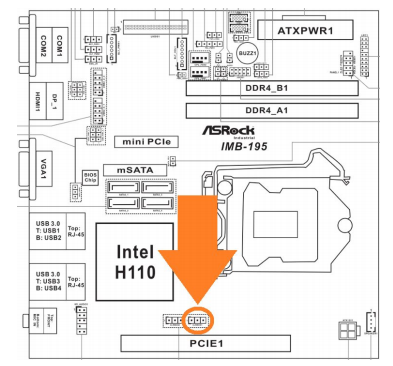
ASRock IMB-195 Motherboard
How to Enable Auto Power On
- Locate the AT/ATX jumper
- Move it over by 1 pin
- Auto power on is now enabled
Troubleshooting
How to Clear CMOS
- Unplug the system from all power and peripherals and perform the Opening steps above.
- Locate the CLRMOS1 jumper
- Move the jumper over by 1 pin
- Wait 30 seconds
- Restore the jumper to its original position
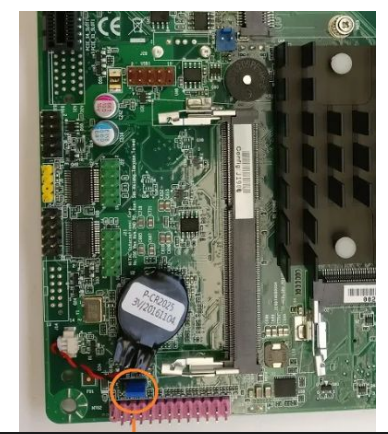
MK100B-53
ASRock IMB-1210 Motherboard
How to Enable Auto Power On
- Take the jumper circled in blue and move it to the pins circled in orange
- The unit is now configured for auto power on

Troubleshooting
How to Clear CMOS
- Unplug the system from all power and peripherals and perform the Opening steps above.
- Locate the clear CMOS jumper
- Move the jumper over by 1 pin
- Wait 30 seconds
- Restore the jumper to its original position
- The CMOS is now clear
MK100B-54
ASRock C246WSI Motherboard
How to Enable Auto Power On
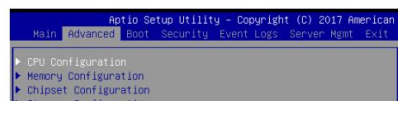
- Power on the unit and press the Del key to access the BIOS
- Navigate to the Advanced tab
- Open the Chipset Configuration menu
- Change “Restore AC Power Loss” to [Power on]
- Save changes and exit
- Auto power on is now enabled
Troubleshooting
How to Clear CMOS
- Unplug the system from all power and peripherals and perform the Opening steps above.
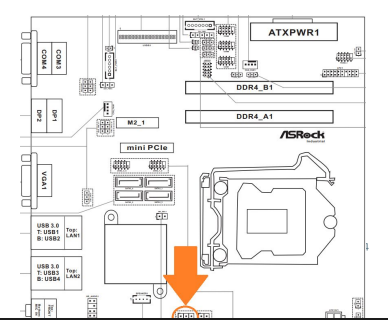
- Locate the clear CMOS pads
- Short the two metal halves with a flathead screwdriver for 30 seconds
- The CMOS is now clear
MK100B-10
Mitac PD11BI-P Motherboard
How to Enable Auto Power On
- Power on the unit and press the Del key to access the BIOS
- Navigate to the Chipset tab
- Change “Restore AC Power Loss” to [Power on]
- Save changes and exit
- Auto power on is now enabled
Troubleshooting
How to Clear CMOS
- Unplug the system from all power and peripherals and perform the Opening steps above.
- Locate the clear CMOS jumper
- Move the jumper over by 1 pin
- Wait 30 seconds
- Restore the jumper to its original position
- The CMOS is now clear
MK100B-30
Jetway NF9G-QM77 Motherboard
How to Enable Auto Power On
- Power on the unit and press the Del key to access the BIOS
- Navigate to the Chipset tab
- Open the “PCH-IO Configuration” menu
- Open the “High Precision Event Timer Configuration” menu
- Change “Restore AC Power Loss” to [Power On]
- Save changes and exit
- Auto power on is now enabled
Troubleshooting
How to Clear CMOS
- Unplug the system from all power and peripherals and perform the Opening steps above.
- Locate the JBAT jumper
- Move the jumper over by 1 pin
- Wait 30 seconds
- Restore the jumper to its original position
- The CMOS is now clear
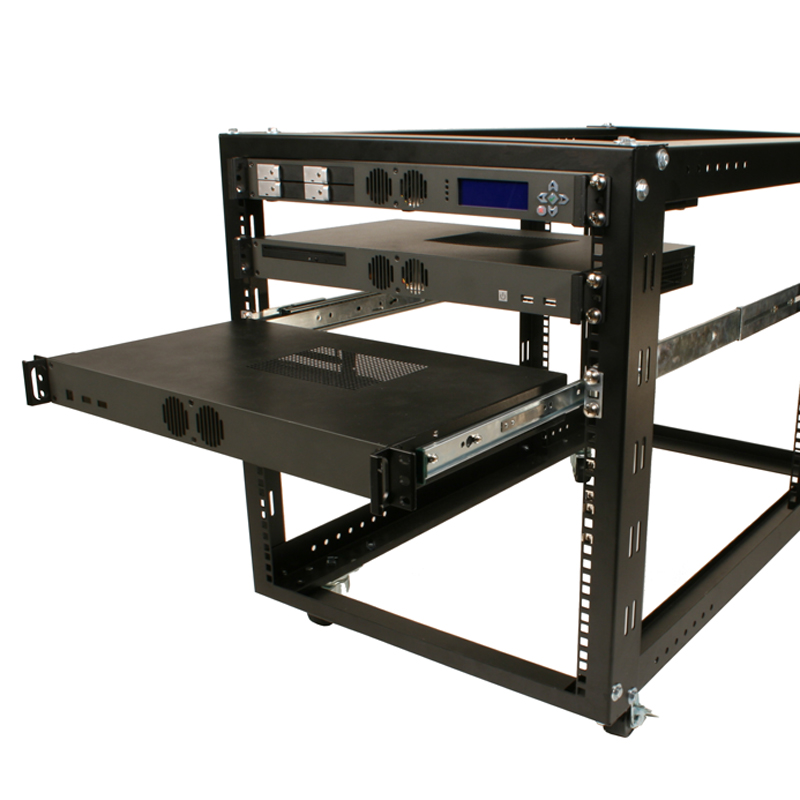
Mounting Options
The MK100/MK150 series can be installed with various mounting options, including: